Exercises to Prevent and Manage Shin Splints: A Guide to Reducing Pain and Enhancing Recovery

Exercises to Prevent and Manage Shin Splints: A Guide to Reducing Pain and Enhancing Recovery

Exercises to prevent and manage shin splints are a crucial weapon in any athlete’s arsenal. These frustrating aches along the shinbone can sideline you from your favorite activities, but with the right approach, you can keep them at bay.


This guide takes a comprehensive look at shin splints, delving into their causes and risk factors. We’ll provide you with effective prevention strategies, treatment options, and a plan for safely resuming your activities. Our goal is to help you get back to enjoying your workouts without pain. Let’s begin!

Exercises to Prevent and Manage Shin Splints: Keeping You Active and Pain-Free

Shin splints, a common issue among athletes and fitness enthusiasts, refer to the painful sensation along the shinbone that can arise from a variety of activities, particularly those involving running or jumping. To prevent and manage this frustrating condition, incorporating specific exercises into one’s routine is important. These exercises are designed not only to prevent the onset of shin splints by strengthening and stretching the leg muscles but also to provide relief and expedite recovery if they do occur.

Understanding the mechanics behind shin splints is crucial in selecting the right exercises and implementing effective strategies. Preventing shin splints involves a combination of strengthening the muscles around the shinbone and the lower leg, as well as employing appropriate stretching routines to maintain flexibility. Meanwhile, if you’re already experiencing shin splint discomfort, certain treatment approaches can be utilized to manage pain and facilitate a safe return to activity. Ensuring proper technique and progressively increasing the intensity of your activities can significantly contribute to preventing the recurrence of shin splints.

Key Takeaways

  • Strengthening and stretching exercises help prevent and manage shin splints.
  • A gradual approach to activity increases safety and efficiency.
  • Correct form and technique are critical in reducing shin splint risk.
 

Understanding Shin Splints

Shin splints, or medial tibial stress syndrome, refer to pain along or just behind the tibia, the large bone in the front of your lower leg. This condition is common among runners, dancers, and military recruits.

Anatomy of the Lower Leg

Your lower leg is comprised of several key structures: bones, muscles, tendons, and connective tissues. The tibia and fibula are the two main bones that support your body weight. The muscles surrounding these bones, such as the gastrocnemius and soleus muscles, contribute to the movement and stability of your ankle and foot.

Causes of Shin Splints

Shin splints often occur due to repetitive stress on the shinbone and the tissues attaching the shinbone to the muscles surrounding it. This stress leads to inflammation and pain. Overworking the lower leg by engaging in intense activities without proper conditioning can lead to this overuse injury.

Risk Factors

  • Intense Physical Activity: Sudden increases in physical activity or changes in workout intensity.
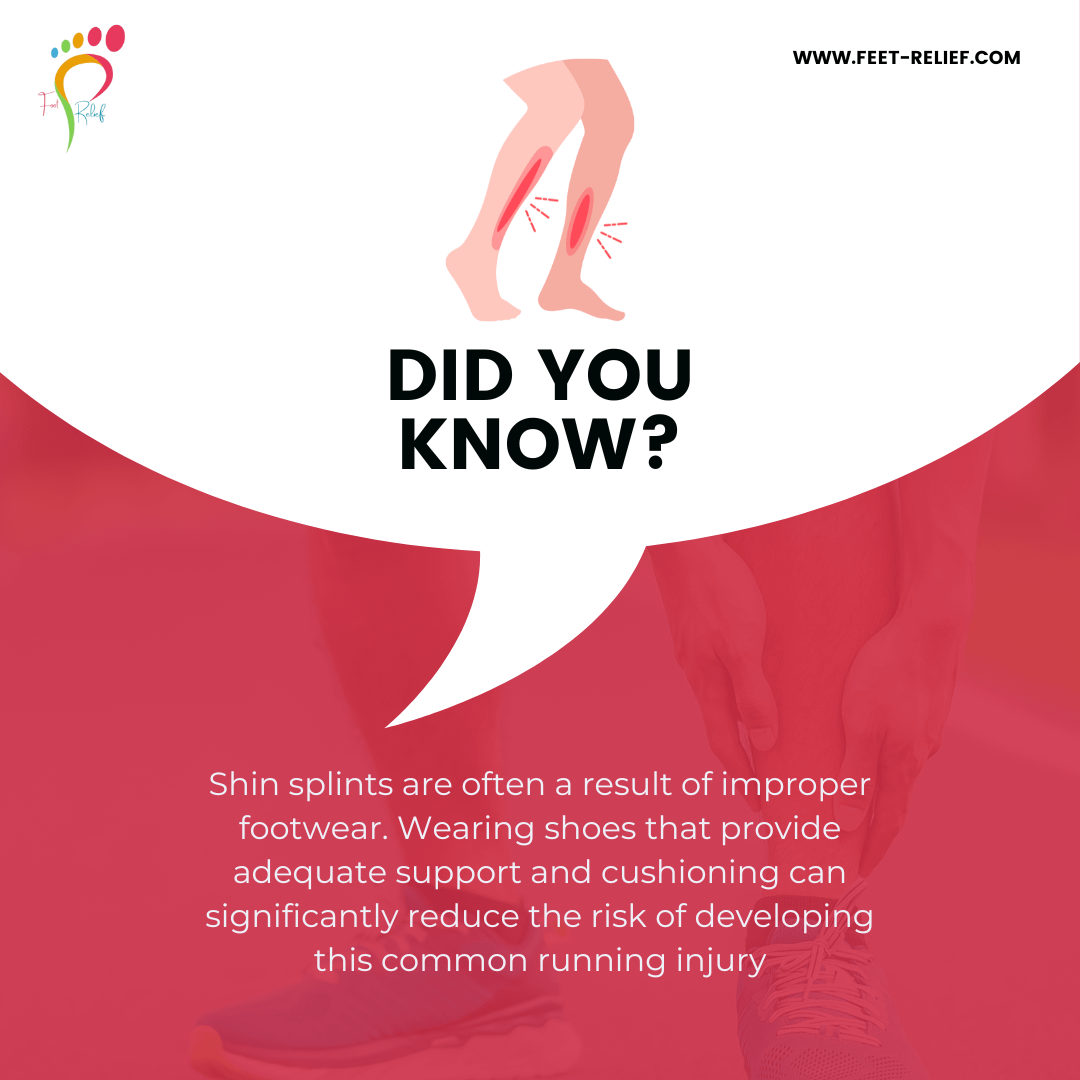
  • Improper Footwear: Wearing shoes that do not offer adequate support can lead to abnormal stress on the lower leg.
  • Arch Type: People with flat feet or rigid arches are more prone to developing shin splints.
  • Surface: Running or training on hard or uneven surfaces can increase the risk.

By understanding the anatomy, causes, and risk factors, you can take targeted steps to prevent shin splints or manage the condition effectively should it occur.


Preventative Strategies

Implementing preventative strategies is essential in avoiding shin splints. Focus on footwear selection, optimizing your running form, and incorporating cross-training to mitigate injury risk.

Proper Footwear Selection

Selecting the right footwear is crucial for shin splint prevention. Your shoes should provide adequate support and match your foot type. Overpronators may need motion-control shoes, while neutral runners might opt for cushioned footwear. Replace your running shoes every 300-500 miles to ensure proper cushioning and support.

Running Technique and Form

Your running mechanics directly affect shin splints risk. Aim for a midfoot strike rather than landing on your heel, as this can decrease stress on your shins. Keep your strides short and quick to minimize the impact on each step. Utilize technique drills and form checks to maintain a correct running posture and stride mechanics.

Cross-Training Considerations

Incorporate cross-training to reduce repetitive strain on your shins. Engage in low-impact activities like swimming or cycling to allow your shins to recover while maintaining fitness. Include strength training in your routine, focusing on calf, ankle, and foot muscles to improve stability and decrease the likelihood of overuse injuries.


Strengthening Exercises

In managing and preventing shin splints, focusing on exercises that build strength in the lower legs is essential. These specific exercises aim to enhance calf muscle power, provide arch support, and improve ankle mobility — key areas that contribute to shin stability.

Calf and Toe Strength

Your calves play a crucial role in absorbing the shock that travels up your leg when your feet hit the ground. Strengthening your calf muscles helps alleviate the strain on your shins.

  • Calf Raises: Perform this exercise by standing with your feet hip-width apart. Push up onto your tiptoes and hold momentarily before lowering back down. Aim for 2-3 sets of 15-20 repetitions. For detailed guidance, consider the steps outlined in this shin splint prevention guide.
  • Toe Walks: This low-impact exercise targets the muscles along your shin. Walk on your tiptoes for 30 seconds. Aim for multiple sets to effectively engage the shin muscles as per this list of best exercises for shin splints.

Arch Support Strengthening

Building the strength of your foot arch can be vital in stabilizing your ankle and reducing stress on your shin.

  • Towel Scrunches: Place a towel on the floor and use your toes to scrunch it toward you. Do this for 1 minute per foot.
  • Heel Walks: Lift the front of your feet and walk on your heels for 30-60 seconds. It will help to fortify the muscles that support your arch.

Ankle Mobility

Ankle flexibility and strength are important for preventing excessive pronation and improving overall leg alignment.

  • Ankle Circles: Sit down with your feet off the ground and move your ankles in circular motions. Do 20 circles in each direction, for each ankle.
  • Alphabet Writing: Use the tip of your foot to ‘write’ the alphabet in the air, which encourages a full range of motion.

Stretching Routines

Regular stretching can greatly reduce the risk of shin splints by improving flexibility and balance in your lower legs. Incorporate these specific stretches into your routine to target areas commonly affected by shin splints.

Calf and Achilles Stretches

To maintain flexibility in the calf muscles and relieve tension in your Achilles tendon, start with a Wall Calf Stretch. Face a wall, extend your arms forward, and place your hands flat against the wall. Step one foot back, keeping it flat on the ground, and push your heel down until you feel a stretch in the calf muscle. Hold for 15 to 30 seconds and switch legs.

Tibialis Anterior Stretch

Stretching the tibialis anterior muscle is crucial because it can tighten when you have shin splints. To perform this stretch, use a Kneeling Shin Stretch. Kneel on the ground and sit back on your heels with the tops of your feet flat on the floor. Gently press down to increase the stretch and hold for 15 to 30 seconds.

Hamstring and Quadriceps Stretches

Keeping your quadriceps and hamstrings flexible can affect the balance of your leg muscles. For the hamstrings, you can try a Hamstring Wall Stretch, where you lie on your back, place your foot against a wall, and straighten your knee to stretch the hamstring. Finally, standing quad stretches will aid in stretching the front thigh muscle. Stand up straight, pull your foot towards your glutes, and hold for 15 to 30 seconds, ensuring your knee points down to maximize the stretch.

Treatment Approaches

To effectively manage shin splints, your approach should include immediate care post-injury, targeted rehabilitation exercises, and potentially the use of orthotics to aid recovery.

Immediate Actions Post-Injury

After experiencing shin pain, immediately rest your legs to avoid further injury. Apply ice packs to the affected area for 15-20 minutes at a time several times a day to reduce swelling. Elevate your legs when possible, and consider using compression to alleviate swelling and provide support.

Rehabilitation Exercises

Once acute pain decreases, gradually introduce rehabilitation exercises. Exercises like toe curls and heel drops can strengthen and stretch the muscles around the shin. Perform exercises in sets and repetitions that do not worsen pain.

  • Toe curls: Place a towel flat on the floor and use your toes to scrunch it towards you.
  • Heel drops: Stand with your heels hanging off a step and slowly lower them below the level of the step.

For specific exercises intended to reduce shin splint pain, you can practice hip raises or engage in calf stretches. These exercises help promote muscle balance and injury prevention.

Use of Orthotics

If your shin splints are related to foot mechanics, orthotics may be beneficial. They can provide support and correct structural abnormalities. Custom orthotics should be considered, but over-the-counter insoles that offer arch support can also be effective. Always have your gait and foot type assessed to ensure you’re using the right orthotic solution.

  • Orthotics for flat feet: Look for insoles with arch support.
  • Orthotics for high arches: Choose insoles with cushioning to absorb impact.

Remember to integrate these treatment approaches with advice from healthcare professionals to optimize your recovery.

Recovery And Return To Activity

After sustaining shin splints, it’s crucial to follow a structured approach to recovery and a careful return to physical activity. These methods help ensure your return to running or sports is safe and sustainable, reducing the risk of re-injury.

Assessing Recovery Progress

Before resuming strenuous activities, confirm that you’ve properly healed. Signs of recovery include absence of pain when pressing on the tibia and during regular walking. Your ability to perform gentle stretches and strengthening exercises without discomfort also suggests that the shin splints are resolving. For instance, if you can complete 15-20 calf raises without pain, you may be ready to move forward.

Gradual Return to Running

When returning to running, start at a lower intensity and volume. You might begin with a walk-run protocol:

  • Start with 1-minute jogging intervals, interspersed with 5 minutes of walking.
  • Gradually increase jog time and decrease walk time over several weeks.

Monitor for any signs of pain, and if they reappear, dial back the intensity. For more structured guidance, refer to coaching-provided running regimes.

Long-Term Management Strategies

To prevent shin splints from recurring, integrate preventative exercises into your regular workout routine, like toe curls and resistance band work to target the shin muscles. Incorporate proper warm-up and cool-down routines, paying attention to the calf and shin areas. Adjust running form and footwear if necessary, since improper gear or technique can contribute to shin splints. Maintain a balanced exercise plan with adequate rest to allow for muscle recovery.

Exercises to Prevent and Manage Shin Splints: Your Path to Pain-Free Movement

By incorporating the strategies outlined in this guide, you’ve equipped yourself with a powerful toolkit to combat shin splints. From understanding the causes and risk factors to implementing preventative exercises, treatment approaches, and a safe return-to-activity plan, you now have the knowledge to keep yourself moving and pain-free.

Have you ever battled shin splints? Share your experiences and any questions you may have in the comments below. Remember, consistency is key! By integrating these exercises and maintaining proper form in your activities, you can significantly decrease your risk of shin splints and keep yourself on the road to achieving your fitness goals. Thanks for reading!

Frequently Asked Questions

Understanding proper techniques and exercises is crucial when dealing with shin splints. This section provides information to help you manage and prevent this common condition.

What are the best stretching routines to manage shin splints?

Stretching routines that target the muscles surrounding your shins are beneficial. For example, doing toe curls and wall stretches can help alleviate the symptoms of shin splints.

How do calf strengthening exercises aid in the prevention of shin splints?

Calf strengthening exercises provide stability to your lower legs and can reduce the strain on your shins. Performing exercises like calf raises aids in developing the muscles to better support your shin bones.

What are the recommended exercises by the NHS for shin splints recovery?

The NHS recommends gentle stretching of the calf muscles, along with specific exercises like heel drops and toe raises, to aid in recovery from shin splints.

Can specific exercise modifications help in avoiding shin splints?

Yes, modifying how you exercise can help prevent shin splints. Activities such as running on softer surfaces and choosing footwear with proper support can significantly impact shin health.

What types of foot and ankle exercises can improve shin splint conditions?

Exercises such as ankle dorsiflexion, ankle inversion, and eversions strengthen the lower leg muscles, which can improve shin splint conditions and enhance overall foot health.

Are there techniques to strengthen the shin area and prevent the occurrence of shin splints?

Techniques to strengthen the shin area include shin muscle exercises like toe taps and resistance band exercises. Building the anterior tibialis muscle helps prevent shin splints by supporting the tibia during high-impact activities.

Conquer Foot Pain and Join the Community!


Ready to ditch the discomfort and embrace pain-free movement? Visit our website, feet-relief.com, for engaging content, expert product reviews, and everything you need to keep your feet happy. Join our passionate community on Facebook (https://www.facebook.com/4feet.relief) and connect with fellow foot health enthusiasts!

Foot Care After Swimming in Pool: Top Tips

Foot Care After Swimming in Pool: Top Tips

Foot care after swimming in a pool? Let’s be honest, who doesn’t love splashing around on a hot day? But chlorine and forgetting your flip-flops by the locker can wreak havoc on your feet. Fear not, fellow pool enthusiast! This guide will help you keep your feet happy and healthy after every swim, so you can keep cool and keep coming back for more.

Foot Care After Swimming in Pool: Essential Tips for Healthy Feet

Many of us have options for swimming year-round. It’s a great way to relax and unwind, and also great exercise. Swimming in a pool can be refreshing, but it can also take a toll on your feet. Knowing proper Foot Care After Swimming in Pool helps keep your feet healthy and happy!

To keep your feet healthy, rinse them with warm water after swimming and make sure to dry them thoroughly. Neglecting foot care can lead to issues like cracked skin, infections, and discomfort. Be sure to dry between your toes, too.

Foot Care After Swimming in Pool

Pay attention to small changes in your feet, such as cuts or blisters.

Wearing flip-flops or water shoes while you’re around the pool can reduce the risk of picking up infections like athlete’s foot.

Pool toe can be avoided by keeping feet dry and wearing breathable footwear.

Keeping your feet moisturized helps prevent dryness and cracking.

Using a good quality foot cream after swimming can make a significant difference.

Don’t share towels as this can spread infections.

Rinsing off and drying feet carefully is essential for maintaining healthy, happy feet.

Key Takeaways

  • Rinse and thoroughly dry feet after swimming.
  • Wear flip-flops or water shoes around the pool.
  • Moisturize feet to prevent dryness and cracking.

Understanding the Importance of Foot Care Post-Swimming

Feet being dried and cleaned after swimming in a pool. Towel and foot care products nearby

After swimming in a pool, it is crucial to pay attention to your feet.

Chlorinated water can have several effects on your skin, and neglecting foot care can lead to various risks and infections.

Effects of Chlorinated Water on Skin

Chlorine keeps the pool clean, but it can be a little rough on your skin. After a long swim, that chlorine can strip away your natural oils, leaving your skin feeling tight and rough. Your feet, especially since they’re often underwater the most, are at even greater risk.

Dry skin can crack, which is not only uncomfortable but also opens the door for infections.

To keep your feet happy and healthy, the key is moisture! Apply a good moisturizing lotion after swimming to replenish what the chlorine took away. Pay extra attention to your heels and those sometimes-forgotten spaces between your toes.

And don’t forget, rinsing off that chlorine right after you leave the pool is the first step to happy, healthy feet!

Risks of Neglecting Foot Care


Skip the foot care after swimming? Big mistake! Not taking care of your feet after a dip can lead to some serious problems.

Athlete’s foot, a nasty fungal infection, loves damp places like pool areas. It’s super contagious and can spread easily if your feet aren’t clean and dry.

So, here’s the plan: always dry your feet completely. Use a clean towel and don’t forget those tricky spots between your toes – that’s where moisture loves to hide.

If you ever notice any itching, redness, or anything else suspicious, consider using an anti-fungal powder or cream to nip it in the bud.

Bonus tip! Wearing flip-flops or water shoes in locker rooms and pool areas can be a lifesaver. They help prevent infections and even injuries from lurking around.

Initial Steps for Foot Care After Swimming

Feet drying on a towel, with a bottle of foot powder and a pair of flip-flops nearby


The key to happy feet after swimming? It all starts with a good rinse! Getting rid of those pool chemicals is important because they can be harsh on your skin, drying it out and causing cracks that can get uncomfortable. Plus, if you don’t rinse them off, they can create an environment for nasty infections to grow.

Rinsing Techniques


After a refreshing dip in the pool, rinsing your feet is a must. Chlorine and other pool chemicals can be real skin bullies, drying it out and causing cracks and irritation.

To keep your feet happy, use cool or lukewarm water for a gentle rinse. Hot water might feel nice, but it actually strips away your skin’s natural oils, leaving it even more prone to dryness.

Don’t forget those tricky areas! Be sure to clean between your toes and around your nails where all that chlorine loves to hide. If you have sensitive skin, a mild soap is your best friend. And if you have any cuts or scrapes, be extra gentle to avoid further irritation.

Drying Feet Thoroughly


Once you’ve rinsed your feet, give them a good drying. Remember, moisture loves to hang out between your toes, and that’s where bacteria and fungi like to set up shop. That can lead to some not-so-pleasant infections.

Use a clean, dry towel and make sure you get in between those toes. You might even consider using a separate smaller towel just for that area – it’s a good way to keep things extra clean.

Letting your feet air dry for a few minutes before putting on socks and shoes can also help. This gives any lingering moisture a chance to escape.

If you’re prone to sweaty feet, using foot powder can help keep them feeling dry and fresh.

This whole drying routine might seem like a bit of extra work, but trust me, it’s worth it! It can greatly reduce your chance of getting athlete’s foot or other yucky fungal infections.

Foot Care After Swimming in Pool

Always opt for moisture-wicking socks if you need to wear them immediately after drying. These will help keep your feet dry longer.

In-Depth Cleaning Strategies

A pair of wet, chlorine-soaked flip-flops sits at the edge of a sparkling pool, surrounded by a collection of foot care products and towels

After swimming, it’s important to deeply clean your feet to avoid any infections or irritation. Pay close attention to exfoliating dead skin and thoroughly cleaning your toenails to keep your feet healthy.

Exfoliating Dead Skin

Use a pumice stone or foot scrub to gently rub away dead skin cells. This helps to prevent calluses and cracked heels.

Steps:

  1. Soak your feet in warm water for 10-15 minutes.
  2. Apply a small amount of foot scrub or soap.
  3. Gently rub the pumice stone or foot scrub in circular motions.
  4. Rinse and dry your feet thoroughly.

Regular exfoliation not only keeps your feet soft but also reduces the chances of fungal infections.

Deep-Cleaning Your Toenails

Dirt and bacteria can accumulate under your toenails, especially after swimming.

Steps:

  1. Trim your toenails straight across to avoid ingrown nails.
  2. Use a soft brush and mild soap to scrub underneath your nails.
  3. Rinse well with warm water.
  4. Dry your feet, focusing on the areas between your toes.

Using an antibacterial wash can also help in keeping infections at bay.

Don’t forget to moisturize your nails and surrounding skin after cleaning for hydration.

Moisturizing Techniques


After swimming in a pool, proper foot care is essential to prevent dryness and cracking. This section covers the best moisturizers to use and how to apply them effectively.

Selecting the Right Moisturizer

Choosing the right moisturizer is key to keeping your feet soft and hydrated.

Look for products that contain humectants like hyaluronic acid or glycerin. These substances attract moisture to the skin, making it feel soft and smooth.

Emollients like shea butter or cocoa butter create a protective barrier on the skin.

This helps to lock in moisture and keep irritants out.

Some moisturizers also contain ceramides, which can help restore the skin’s natural barrier.


For added benefits, consider moisturizers with essential oils like lavender or tea tree oil, which have soothing and antibacterial properties.

Avoid products with alcohol or strong fragrances, as these can further dry out your skin.

Application Methods for Optimal Absorption

Proper application of moisturizer ensures that your feet get the maximum benefit.

Start by washing your feet thoroughly with mild soap and warm water.

Pat them dry with a clean towel, making sure to get between your toes.


Apply a generous amount of moisturizer to your feet.

Use gentle, circular motions to massage it into your skin.

This helps improve blood circulation and ensures the product is evenly distributed.

Pay extra attention to any dry or rough areas, like the heels and the balls of your feet.


For best results, apply moisturizer right after swimming and before bed.

Wearing moisture-locking socks overnight can enhance absorption and keep your feet hydrated longer.

If your feet are extremely dry, consider soaking them in cold whole milk for 10 minutes before applying moisturizer to soften the skin.

Preventive Measures

Foot Care After Swimming in Pool

Taking proper care of your feet before and after swimming can prevent common issues like infections and skin damage. Focus on wearing the right footwear and using protective barriers to keep your feet safe.

Proper Footwear for Pool Use

Wearing the right type of footwear is crucial for protecting your feet at the pool.

Choose waterproof sandals or aqua shoes. These should be worn at all times when walking around the pool area.

They help prevent contact with surfaces that may harbor fungi or bacteria.


Look for footwear with non-slip soles to avoid accidental falls on wet surfaces.

Make sure they fit well but allow for some airflow to keep your feet dry.

Avoid sharing your sandals with others to lessen the risk of spreading infections.

Using Protective Barriers

Using protective barriers can significantly reduce the risk of skin issues.

Apply a thick layer of petroleum jelly or a specialized foot cream before putting on your footwear.

This creates a barrier between your skin and any irritants.


After swimming, rinse your feet with fresh water and apply an antifungal spray or powder.

Make sure to thoroughly dry your feet, especially between the toes. This helps prevent moisture from causing problems, such as athlete’s foot.


Avoid sharing towels with others, as they can carry harmful bacteria or fungi.

Use clean, dry towels to keep your feet as hygienic as possible.

Addressing Common Foot Problems

Swimming in pools can lead to various foot problems. Knowing how to prevent and treat these issues is key to maintaining healthy feet.

Athlete’s Foot and Fungal Infections

Athlete’s foot and other fungal infections thrive in damp environments like swimming pools and locker rooms.

These infections can cause itching, redness, and peeling skin between your toes.


To prevent these infections, wear flip-flops or waterproof sandals in communal areas.

Keep your feet clean and dry by washing them with soap and water and thoroughly drying them afterward.


If you do get a fungal infection, over-the-counter creams or sprays can help.

Look for products containing clotrimazole or terbinafine. If symptoms persist, consult a healthcare professional for stronger treatments.

Dryness and Cracking

Exposure to chlorinated pool water can strip your skin of natural oils, leading to dryness and cracking. This makes your feet more prone to pain and infections.

To combat dryness, moisturize your feet regularly with a thick cream or ointment.

Apply it right after drying your feet to lock in moisture.

Choose products with ingredients like urea or glycerin for the best results.


Avoid walking barefoot on rough surfaces, and consider wearing socks that keep your feet cushioned.

If severe cracking occurs, a pumice stone can help remove dead skin before moisturizing.

Dealing With Blisters and Cuts

Blisters and cuts can develop from walking barefoot on hot pool decks or rough surfaces.

These can be painful and may get infected if not properly treated.

To prevent blisters, wear protective footwear when walking around the pool area.

Choose shoes that fit well and are designed for water use.

If you get a blister, don’t pop it as it can lead to infection.

Instead, protect it with a bandage and keep it clean and dry.

For cuts, wash the area with soap and water, apply an antibiotic ointment, and cover with a sterile bandage.

Advanced Foot Care Tips

Taking care of your feet after swimming requires more than just drying them off.

Advanced tips like regular pedicures and foot muscle strengthening can make a big difference in maintaining healthy feet.

Regular Pedicure Benefits

Having regular pedicures can greatly benefit your foot health.

Pedicures help to remove dead skin and calluses, which can build up and cause discomfort or infection.

This is especially important after spending time in chlorinated pools.

Pedicures also include moisturizing treatments that keep your skin hydrated.

Dry feet are more prone to cracking and infections, so keeping them moisturized is essential.

Additionally, nail trimming during pedicures prevents ingrown toenails, which can be painful and lead to further issues if not properly managed.

You may consider professional help or do it yourself with a home pedicure kit.

Whether you choose to go to a professional or DIY, regular pedicures can keep your feet in better shape.

Strengthening Foot Muscles as an aid to Foot Care After Swimming in Pool

Strengthening your foot muscles is another important aspect of advanced foot care.

Strong foot muscles can help prevent common swimming-related foot problems like cramps and fatigue.

Simple exercises can make a significant difference.

Toe curls and ankle rotations are effective exercises for improving muscle strength.

Try picking up small objects with your toes or sitting with a resistance band around your foot and pushing against the band.

These exercises can be done at home and take just a few minutes each day.

Maintaining strong foot muscles helps with overall stability and can reduce the risk of injuries.

By incorporating these exercises into your routine, you can keep your feet strong and healthy, ready for your next swim.

Foot Care After Swimming in Pool: Keep Your Feet Happy!

So, we’ve covered all the bases for keeping your feet in tip-top shape after a refreshing pool dip. Remember, the key takeaways are to rinse off chlorine thoroughly, dry between your toes religiously, and moisturize like a champ. Think of your feet as little underwater explorers – they deserve some TLC after battling chlorine and navigating slippery pool decks!

Putting these tips into action is as easy as splashing into the shallow end. Pack a small travel-sized moisturizer and a separate towel for your feet in your pool bag. Slide on those flip-flops whenever you’re not swimming, and don’t be afraid to pamper yourself with a relaxing foot soak or a quick pumice stone treatment at home.

With a little extra care, your feet will be ready to take on your next pool adventure, leaving you feeling confident and comfortable whether you’re lounging poolside or conquering laps. Happy swimming!

Frequently Asked Questions

A person sitting by a pool, towel and sandals nearby, holding a bottle of foot care product,

Many people experience foot issues after swimming. This section addresses various treatments and remedies for such problems.

How can one treat foot pain after swimming?

To treat foot pain after swimming, soak your feet in warm water with Epsom salt for about 15-20 minutes.

This can help relax your muscles and decrease inflammation.

What remedies are available for foot blisters caused by swimming pools?

If you develop blisters, keep the area clean and dry.

Apply an antiseptic ointment and cover the blister with a bandage.

Avoid popping the blister to prevent infections.

How can swimmers' foot be effectively treated?

Swimmer’s foot, or athlete’s foot, can be treated with over-the-counter antifungal creams.

Wash and dry your feet thoroughly, and apply the cream as directed.

What are common foot fungal infections associated with swimming pools and their treatments?

Common fungal infections include athlete’s foot and ringworm.

Treatment usually involves antifungal creams or sprays. Wear sandals in public pool areas to reduce the risk of these infections.

How can burning sensations in the feet be addressed after swimming?

For burning sensations, soak your feet in cool water and apply aloe vera gel. This can soothe the skin and reduce discomfort.

What steps should be taken to disinfect feet following pool use?

To disinfect your feet, wash them thoroughly with soap and water right after swimming.

Dry them completely, especially between the toes, to prevent fungal infections.

Using disinfection methods like PHMB can also help if you’re prone to irritation.

Feet Feeling Funky?

Tired of foot pain, diseases, and troubles slowing you down?

Join our community of foot enthusiasts at feet-relief.com and Facebook!

Discover engaging content, helpful product reviews, and connect with others who share your passion for happy, healthy feet!

Effects of Ocean Water and Beach on Feet: Health Benefits and Risks

Effects of Ocean Water and Beach on Feet: Health Benefits and Risks

The effects of ocean water and beach on feet go far beyond just burying your toes in the sand. Sure, the feeling is unbeatable, but beneath the surface (literally and figuratively) lies a treasure trove of benefits for your feet. From natural exfoliation to stress relief, a day at the beach can be a total foot spa experience. But wait, there’s more! Just like any adventure, there can be a few things to watch out for. Let’s dive into the wonderful world of beach feet, exploring how the ocean and sand can heal, invigorate, and maybe require a little extra TLC.

Effects of Ocean Water and Beach on Feet: Health Benefits and Risks

We love the beach! The fresh salty air, the waves, and that warming sun just make the day seem so special. Spending time at the beach can do wonders for your feet, too. And the Effects of Ocean Water and Beach on Feet include many health benefits with a few potential risks.

Walking on the sand naturally exfoliates your skin, removing dead cells and leaving your feet soft and smooth.

Additionally, the minerals in ocean water, such as magnesium and calcium, can nourish and strengthen your skin, making it more resilient to everyday wear and tear.

Effects of Ocean Water and Beach on Feet

Soaking your feet in the ocean can also have a therapeutic effect.

The saltwater can help reduce inflammation and promote healing in minor cuts and scrapes.

For those with skin conditions like eczema, the minerals and salt in sea water may offer soothing relief.

Key Takeaways

  • Sand exfoliates and smooths your feet naturally
  • Ocean minerals contribute to skin health
  • Saltwater aids in reducing inflammation and promoting healing

Influence of Salinity on Skin

Salinity in ocean water can affect your skin in various ways. The salt content can hydrate or dehydrate, act as a natural exfoliant, and sometimes cause irritations.

Hydration and Dehydration: Effects of Ocean Water and Beach on Feet

Salt water can help your skin retain moisture.

The minerals in salt, like magnesium, can lock in moisture, making your skin feel more hydrated. This is why some people notice a softer texture after spending time in the ocean.

However, prolonged exposure can lead to dehydration.

The high salinity of ocean water can draw moisture out of your skin if you spend too much time swimming.

You might feel your skin getting tight and dry.

Balancing your time in the water and moisturizing afterwards can help maintain hydration.

Salt as a Natural Exfoliant

Salt acts as a gentle exfoliant.

The fine grains of sea salt can slough off dead skin cells, promoting smoother and softer skin.

Rubbing salt water on your skin can help remove impurities and unclog pores.

This natural exfoliation process can be beneficial for people with acne-prone skin. It can reduce blackheads and whiteheads with regular use.

Just be careful not to over-exfoliate, as it could leave your skin sensitive or irritated.

Effects of Ocean Water and Beach on Feet

Potential Skin Irritations

While salt water has many benefits, it can sometimes irritate sensitive skin. These Effects of Ocean Water and Beach on Feet need to be considered when you plan your visit.

People with conditions like eczema or psoriasis might find that ocean water soothes their symptoms by reducing inflammation.

However, wounds or cuts exposed to salt water can sting and become more irritated. While the salt water might have some healing benefits, the Effects of Ocean Water and Beach on Feet that have open cuts might be a bit painful.

This is because the salt enters the broken skin and causes discomfort.

If you have sensitive skin or open wounds, it’s best to rinse off with fresh water after swimming in the ocean.

Applying a gentle moisturizer can also reduce potential irritation.

Physical Impact of Sand on Feet

Walking on sand has several effects on your feet. These impacts can include exfoliation, pressure point stimulation, and use as a natural pumice. I love walking on the beach and find the Effects of Ocean Water and Beach on Feet to be an amazing way to relax and unwind.

Exfoliation by Sand Particles

Walking barefoot on sand gently scrubs away dead skin cells. The rough texture of sand serves as a natural exfoliant.

This process reveals the smoother skin beneath, leaving your feet feeling soft and rejuvenated. Regular exposure can help manage calluses and rough patches.

Remember to moisturize after walking on sand to keep your skin hydrated.

Pressure Points and Foot Health

Sand evenly distributes pressure across your feet.

As you walk, your feet naturally massage themselves. This stimulation can improve circulation, helping to reduce swelling and fatigue.

Engaging various muscles and tendons leads to stronger, healthier feet.

Sand as a Natural Pumice

Sand acts like a natural pumice stone.

It can smooth out corns and calluses. As you walk, the gentle abrasion helps to keep your feet smooth.

This is beneficial for maintaining overall foot health. Regular beach walks can be a simple and effective way to take care of your feet.

Effects of Ocean Water and Beach on Feet

Thermal Effects of Beach on Feet

Walking or running on beach sand can have positive and negative impacts on your feet, depending on the temperature of the sand.

Benefits of Warm Sand

Warm sand can help relax your muscles.

When you walk barefoot on warm sand, it massages your feet, promoting blood circulation. This can relieve tension and pain.

Warm sand can also exfoliate your feet naturally, removing dead skin cells and keeping your feet smooth.

Warm sand may also help soothe aches, making it a natural remedy for mild foot discomfort.

A stroll on warm sand can feel therapeutic. It’s a simple yet effective way to unwind and take advantage of nature’s benefits.

Risks of Hot Sand

Hot sand can cause burns on the soles of your feet.

If the sand temperature is too high, it can lead to thermal injuries, resulting in painful, erythematous (red) patches on the skin.

These burns may require medical attention if severe. Moreover, constantly exposing your feet to hot sand can dry out your skin, leading to cracks and discomfort.

Athletes and beachgoers should be cautious. Running or playing sports barefoot on hot sand increases the risk of injuries.

It’s wise to wear protective footwear to avoid these hazards.

Microbial Interactions with The Skin

The skin on your feet interacts with various microbes when you visit the ocean or beach. Some of these microbes can be beneficial, while others might cause infections.

Beneficial Microbes

Your skin hosts a variety of beneficial bacteria.

These microbes help prevent more harmful organisms from colonizing your skin. When you expose your feet to ocean water, there is a temporary change in the skin microbiome.

Ocean water can introduce new types of bacteria, such as those from the genera Proteobacteria and Actinobacteria.

These bacteria can help boost your skin’s natural defenses. They play a role in maintaining skin health and providing immunity against other harmful bacteria.

Harmful Microorganisms and Infections

Exposing your feet to the beach and ocean may also introduce harmful microorganisms.

These can cause skin infections if they manage to invade through cuts or abrasions.

Pathogens such as Vibrio species and certain Bacteroidetes may be present in ocean water.

Recreational water exposures have been linked to skin infections and irritations, so it is important to clean and inspect your feet after beach visits.

Ocean water can wash off the skin’s natural microbiome, which might reduce your skin’s ability to fight infections.

If you notice any signs of infection, such as redness or swelling, seek medical attention promptly.

Healing and Therapeutic Properties

Ocean water and sandy beaches provide unique benefits for your feet. They help your body absorb key minerals and offer natural stress relief.

Mineral Absorption Through The Skin

Sea water contains high levels of minerals like magnesium, potassium, and calcium.

When you soak your feet in ocean water, these minerals can be absorbed through your skin.

This can help improve circulation and reduce inflammation.

Magnesium, in particular, plays a role in easing muscle tension and cramps. It’s also known to support nerve function.

Regular exposure to these minerals can help maintain your foot health, making them feel rejuvenated and refreshed.

Stress Reduction and Foot Massage

Walking on the beach can act as a natural foot massage.

The texture of the sand gently stimulates the soles of your feet.

This can improve blood flow and relax muscle tissue. The rhythmic motion of the waves also has a calming effect.

The combination of physical activity and the relaxing environment can lower stress levels and elevate your mood.

Additionally, the coolness of the water can help reduce swelling, offering further comfort to tired feet.

Environmental Factors Affecting Foot Health

Your feet can be vulnerable to various environmental factors at the beach, including pollution and the need for proper protection against sensitive skin conditions.

Pollution and Toxin Exposure

Polluted beach water can pose significant health risks to your feet.

Runoff from nearby fields, yards, and paved surfaces can carry contaminants to the beach, leading to issues like gastroenteritis.

This illness often results from swimming in water contaminated with sewage and can cause symptoms like nausea, vomiting, and diarrhea.

Beyond this, polluted beaches can lead to infections in your ears, eyes, nose, and throat, impacting overall foot hygiene.

Pollution damages unique habitats needed by beach animals and plants. This can limit your enjoyment of recreational activities and harm the community’s economic growth.

Therefore, it’s essential to stay informed about the water quality of your beach destination.

Checking local advisories and avoiding areas known for pollution can be beneficial for your foot health.

Learn more about the impact of beach pollution from the U.S. Environmental Protection Agency (EPA).

Protection for Sensitive Skin

Walking or running barefoot on hot sand can lead to a condition known as “beach feet,” characterized by tender, erythematous patches on the feet.

This condition results from direct contact with hot sand, causing irritation and potential burns.

You can prevent these issues by wearing appropriate footwear, such as water shoes or sandals, to provide a barrier between your feet and the hot surface.

Additionally, saltwater can dry out your skin, leading to cracks and increased sensitivity.

Applying a broad-spectrum, water-resistant sunscreen to your feet can protect against sunburn.

Keeping your feet clean and moisturized after a beach day is also crucial.

For further advice on foot protection, visit CarePlus Foot & Ankle Specialists.

Preventive Care and Best Practices

Taking care of your feet at the beach is crucial for avoiding injuries, infections, and other issues.

Pay attention to footwear choices and proper aftercare to keep your feet healthy.

Proper Footwear Choices

Wearing the right shoes at the beach can save you from cuts, burns, and other injuries.

Water shoes or sandals with hard soles protect your feet from sharp objects like shells and rocks.

If you walk on hot sand or sidewalks, make sure your shoes have good insulation to prevent burns.

For those with diabetes, always wear shoes to avoid cuts and injuries which can easily lead to infections.

Avoid going barefoot if possible.

Always bring an extra pair of shoes in case one gets wet. Look for shoes that dry quickly and fit well to avoid blisters.

Aftercare Following Beach Exposure

After spending time at the beach, it’s important to clean and check your feet.

Rinse off any sand and saltwater as these can cause skin irritation.

If you notice any cuts or blisters, treat them right away to avoid infection, especially if you have diabetes.

Dry your feet thoroughly, paying special attention to the spaces between your toes.

Apply sunscreen on the tops and bottoms of your feet to protect against sunburn.

Moisturize your feet to keep the skin from getting dry and cracked.

Regularly check your feet for any signs of injury or infection, and seek medical help if necessary.

Learn more about proper foot care at the beach by visiting the IPFH Foot Health for Beach and Water Sports.

So, Beach Trip or Foot Spa Day? The Effects of Ocean Water and Beach on Feet

Remember that time you walked barefoot on the beach and the sand felt like a million tiny masseuses working their magic? Turns out, there’s more to that feeling than just pure bliss. Ocean water and beach sand boast a surprising number of benefits for your feet, from natural exfoliation and improved circulation to stress relief and mineral absorption.

But just like that perfect seashell you found has a rough underside, there can be downsides too. Watch out for hot sand, polluted water, and potential exposure to bacteria. The key? Knowing how to prepare and take care of your feet after a beach day.

So, the next time you head to the beach, skip the flip flops for a bit and let your feet experience the magic of the sand and surf. Just remember to pack some water shoes, sunscreen, and moisturizer to keep your feet happy and healthy. After all, happy feet make happy beach memories!

Frequently Asked Questions: Effects of Ocean Water and Beach on Feet

Walking on the beach has its perks and risks. From potential foot conditions to the benefits of sand, here’s what you need to know about protecting your feet at the beach.

Can walking on the beach barefoot lead to any foot conditions?

Yes, walking barefoot on the beach can lead to foot conditions like cuts, blisters, and infections.

The sand might hide sharp objects, and constant friction can cause skin irritations. Sometimes, exposure to bacteria in the sand can cause infections or athlete’s foot.

What are the benefits of walking on sand for your feet and knees?

Walking on sand can strengthen your feet and leg muscles due to the uneven surface.

The instability helps improve balance and coordination. Additionally, it provides a natural massaging effect that can enhance blood flow and reduce stress.

What should I do if my foot swells after stepping on something at the beach?

If your foot swells, clean the wound with fresh water and apply a cold compress.

Elevate your foot and avoid putting pressure on it. If swelling persists, seek medical attention, as it could indicate an infection or a serious injury.

Can exposure to salt water help kill foot fungus?

Exposure to salt water might help kill foot fungus due to its natural anti-septic properties. However, it’s not a guaranteed cure.

It can reduce symptoms and prevent infections, but persistent conditions should be treated with appropriate medications.

Why might someone experience foot pain or skin irritation after a day at the beach?

Foot pain or skin irritation after a day at the beach can be caused by the rough texture of sand, prolonged exposure to sun, or stepping on hidden objects.

Additionally, salt water can dry out the skin, causing cracks and irritation.

Beach Feet Bliss: Beyond the Sandcastle

Love that feeling of sand between your toes? Us too! But beach days can also mean dry skin, blisters, and tired arches.

Head over to our website for foot care tips and product reviews to keep your beach feet happy!

Join our Facebook community and connect with fellow foot care enthusiasts for shared experiences and expert advice. Let’s keep those beach adventures going!

Foot Health Tips for Different Seasons: Adapting Your Care Routine With The Climate

Foot Health Tips for Different Seasons: Adapting Your Care Routine With The Climate

Foot health tips for different seasons? Believe it or not, our feet take a beating year-round. From sweaty summer sandals to cozy winter boots, the weather throws a lot at our tootsies. But fear not, fellow foot enthusiasts (or maybe you just don’t want to deal with stinky shoes or painful blisters), because this handy guide has you covered. We’ll explore how to keep your feet happy and healthy through every season, from spring cleaning your feet after a winter hideaway to navigating those treacherous autumn leaves without a tumble. So ditch the socks (for now) and get ready to dive into the wonderful world of seasonal foot care!

Foot Health Hacks: Keeping Your Toes Happy All Year Round


Maintaining foot health throughout the year is essential as each season comes with its distinct challenges and considerations. Variables like temperature, humidity, and activity level can all impact your foot well-being. For instance, the warm and sometimes wet conditions of spring may require you to pay more attention to keeping your feet dry to prevent fungal infections, while summer might demand more breathable footwear to manage heat and sweat.


A collection of shoes and foot care products arranged by season, with corresponding weather and activity icons


As autumn arrives, cooler temperatures and falling leaves might necessitate footwear that provides warmth and prevents slip-related injuries. Meanwhile, winter brings about its own set of concerns, such as the need for boots that not only keep your feet warm but also dry and protected against the harsh conditions. Good foot care is not just about choosing the right footwear; it’s also about the daily practices that support the strength and health of your feet. Regular inspection, proper hygiene, and appropriate seasonal adjustments are foundational habits that support foot health throughout the year.

Key Takeaways

  • Proper footwear and hygiene are crucial for maintaining foot health year-round.
  • Seasonal changes necessitate adjustments in foot care routines.
  • Regular foot inspection is essential for detecting and preventing potential issues.

Understanding Foot Health


A variety of footwear for different seasons displayed on shelves, with a focus on comfort and support. Various foot health products and tips are showcased alongside the shoes


Maintaining healthy feet is crucial regardless of the season, as your feet are the foundation for overall body support and locomotion. Let’s explore the structures that make up your foot and common issues that can arise in different seasons.

The Anatomy of the Foot

Your foot is a complex system composed of bones, muscles, tendons, and ligaments.26 bones work in unison, forming two main sections: the forefoot (toes and five longer bones called metatarsals) and the hindfoot (heel and ankle). The arches of your feet are supported by the tendons and ligaments, which absorb shock and distribute weight during movement.

  • Forefoot: Contains phalanges (toe bones) and metatarsals.
  • Midfoot: Forms the foot’s arch and includes cuboid, navicular, and cuneiform bones.
  • Hindfoot: Made up of the talus (ankle), calcaneus (heel), and connects to the two lower leg bones tibia and fibula.

Common Foot Problems by Season

Spring/Summer: When temperatures rise, feet often sweat more, making you susceptible to athlete’s foot, a fungal infection. Choosing well-ventilated shoes and moisture-wicking socks can help prevent this.

  • Athlete’s Foot: Fungal infection causing itching, redness, and peeling.
  • Overheating: Possible issues like swollen feet due to heat.

Autumn/Fall: Cooler weather can bring relief, but don’t ignore your feet. Damp, fallen leaves can create slippery surfaces, increasing the risk of ankle sprains.

  • Ankle Sprains: Torn or stretched ligaments resulting from twisting your ankle.

Winter: Colder climates mean closed shoes and boots, which can lead to ingrown toenails and chilblains. Ensuring proper shoe fit is essential to avoid toenail damage.

  • Ingrown Toenails: When the corner of your toenail grows into the flesh.
  • Chilblains: Painful inflammation of small blood vessels in your skin responding to sudden warming from cold temperatures.

Spring Foot Care


A blooming garden with various flowers and plants, representing the different seasons. A foot stepping onto soft, fresh grass, with a gentle breeze in the air


With the arrival of spring, it’s time to give your feet the attention they deserve after being cocooned in winter footwear. This section aims to guide you on moisturizing effectively, choosing the right footwear for the season, and managing any foot-related allergies that may arise.

Moisturizing Tips for Spring

Hydration from Within:

  • Drink ample water to maintain overall hydration levels, which contributes to healthier skin on your feet.

Topical Moisturizers:

  • Apply a foot-specific lotion or cream to keep the skin on your feet supple, targeting dry areas to prevent cracking.

Adequate Footwear for Warmer Weather

Material Matters:

  • Opt for shoes with breathable fabrics like canvas or mesh to help prevent excessive perspiration and odor.
  • Avoid plastic or non-breathable materials that can trap moisture and lead to fungal infections.

Supportive Sandals:

  • Choose sandals with arch support to avoid strain during outdoor activities. Flat options without adequate support can lead to foot pain or injury.

Allergy Management for Feet

Antihistamines:

  • Consider over-the-counter antihistamines if you experience allergic reactions affecting your feet.

Barrier Creams:

  • Use hypoallergenic barrier creams to protect your skin from plant allergens or irritants commonly found during spring.

Cleansing Routine:

  • Regularly wash your feet to remove allergens and apply a soothing cream to any irritated areas.

Summer Foot Health


During summer, your feet require particular care to prevent sunburn, manage perspiration, and protect against waterborne infections.

Protection from Sun and Heat

In summer, your feet are just as susceptible to sunburn as the rest of your body. Apply a broad-spectrum sunscreen with an SPF of 30 or higher on your feet when wearing open shoes or sandals. Additionally, wearing light, breathable shoes can protect your feet from overheating and developing heat rash or blisters.

Managing Sweat and Odor

Heat often increases foot perspiration, leading to odor and discomfort. Opt for moisture-wicking socks and rotate your shoes to give each pair a chance to dry out fully. Products containing emollients can hydrate your feet and help manage dry skin, which can otherwise become more prevalent with frequent washing or exposure to pool water.

Water Safety for Feet

Pools, beaches, and lakes are breeding grounds for bacteria and fungi. Always wear water shoes to prevent cuts and abrasions, and to protect against plantar warts or athlete’s foot. After swimming or wading, thoroughly dry your feet, especially between the toes, to prevent fungal infections.

Autumn Foot Care


Leaves in various colors are scattered on the ground. A cozy pair of socks and a moisturizing foot cream are placed next to a pair of shoes


As autumn arrives, it’s essential to adapt your foot care routine to the changing weather. This includes selecting appropriate footwear for cooler temperatures, maintaining hydration, and ensuring that your feet have the necessary support to navigate the often uneven terrain covered with fallen leaves.

Transitioning to Cooler Weather Footwear

With the drop in temperature, it’s time to transition from sandals to closed-toe shoes and boots. Prioritize footwear that offers ample room for your toes, as this will enhance circulation and reduce the risk of blisters and pressure sores. Breathable materials like leather or high-quality synthetics are also crucial to prevent excessive moisture that can lead to fungal infections. It’s important to wear shoes that fit well and provide adequate insulation.

Foot Hydration as Temperatures Drop

Cooler air can dehydrate your skin, including the skin on your feet, leading to dryness and cracks. Moisturizing your feet daily becomes even more vital in autumn. Look for a cream that’s formulated specifically for feet and apply it every night before bed. For best results, exfoliate with a pumice stone weekly to remove dead skin, which allows for deeper penetration of the moisturizer. Remember, foot-hydration is not just about applying cream; staying hydrated by drinking water is equally important to maintain your skin’s health from the inside out.

Supportive Footwear for Fallen Leaves Terrain

Autumn typically means more debris and fallen leaves on the ground, which can create slippery and uneven surfaces. Invest in shoes with a sturdy outsole to provide increased traction and consider supportive features like insoles or custom orthotics if necessary. Proper support will help prevent injuries as you navigate through the varied autumn terrain. For those who participate in fall sports or outdoor activities, ensure your footwear caters to the demands of your specific exercises.

Winter Foot Well-being


In winter, your feet face unique challenges. It’s crucial to keep them warm, dry, and well-circulated to maintain their health during the colder months.

Keeping Feet Warm and Dry

Your feet are more prone to dryness and cracking in cold weather due to heaters and the dry winter air. To prevent these issues, moisturize daily with a high-quality foot cream to hydrate your skin. Choose footwear that is waterproof and insulated to keep your feet warm and dry, especially when engaging in activities like winter sports.

Avoiding Slips and Falls on Ice

To reduce the risk of falls on icy surfaces, invest in shoes with non-slip soles or use traction cleats that can be attached to your existing footwear. When walking on potentially slippery areas, take shorter steps and walk flat-footed to increase your stability.

Circulation Improvement during Cold Months

Cold temperatures can diminish blood flow to your feet, increasing the risk of frostbite. Keep blood circulation optimal by wearing loose layers of socks for insulation; tight socks can constrict blood flow. Regularly exercising your feet and ankles with simple movements can also improve circulation during the winter season.

Foot Health Tips for Different Seasons: Keeping Your Feet Happy All Year Round


So there you have it! From spring cleaning your feet to mastering the art of winterproofing your tootsies, this guide has equipped you with the knowledge to keep your feet healthy and happy throughout the year. Remember, a little TLC goes a long way – consistent moisturizing, regular shoe rotation, and choosing the right footwear for the season are all key players in maintaining good foot health. Don’t forget to listen to your feet! Pay attention to any discomfort or changes and address them promptly. For any lingering concerns, a visit to your podiatrist is always a good idea.

Thanks for joining us on this foot care journey! We hope these tips help you keep your feet feeling fantastic all year long. Now go forth and conquer the world, one happy step at a time!

Frequently Asked Questions


A colorful array of seasonal footwear and foot care products displayed with corresponding foot health tips


In this FAQ section, you’ll find specific advice on how to care for your feet through the changing seasons, ensuring comfort and health year-round.

What are the best practices for foot care during the summer months?

During the summer, your feet are often exposed to heat and sunlight, increasing the risk of sunburn and fungal infections. It’s important to wash your feet regularly with soap and water, dry them thoroughly, and apply sunscreen to the tops of your feet when wearing sandals.

How should I modify my foot care routine in cold weather?

Cold weather can cause your skin to become dry and cracked. To combat this, moisturize your feet daily and wear moisture-wicking socks to keep them dry. Choose footwear that provides insulation and waterproofing to protect against cold and damp conditions.

What steps can I take to restore the health of my feet?

Restoring the health of your feet involves maintaining good hygiene, using the appropriate creams or treatments for foot conditions, and wearing shoes that properly support your feet. Consider visiting a podiatrist if you have persistent issues.

What causes foot skin issues in the summer, and how can I prevent them?

Foot skin issues in the summer, such as blisters and athlete’s foot, are often due to increased moisture from sweating and wearing closed shoes. To prevent these issues, choose breathable footwear and change your socks as needed, ensuring your feet stay dry.

Are there specific footwear recommendations for maintaining foot health throughout the seasons?

Yes, footwear should be chosen based on the season. In summer, opt for lightweight, breathable shoes, while in the winter, choose insulated and waterproof shoes. Ensure that your shoes fit well and provide proper support year-round.

How can I protect my feet from seasonal conditions such as dryness or humidity?

To protect your feet from dryness, moisturize them daily and avoid excessively hot showers. In humid conditions, keep your feet dry with moisture-wicking socks and use antifungal powders if necessary to reduce the risk of fungal infections.

Craving Happy Feet?


Dive deeper into the world of foot care on our website ! Discover insightful articles, product reviews, and connect with a vibrant community passionate about foot health and relief. Join us on Facebook too! We can’t wait to welcome you.

Balance Exercises for Improving Stability: A Guide to Enhanced Body Equilibrium

Balance Exercises for Improving Stability: A Guide to Enhanced Body Equilibrium

Have you ever found yourself wobbling a bit more than you’d like, whether reaching for something on a high shelf or navigating a tricky hiking trail? That’s when I realized I needed to try some balance exercises for improving stability. Adding these exercises to my routine has been a real game-changer, making me feel steadier and more coordinated in everything I do.


These simple yet powerful routines have helped me move more confidently and efficiently. If you are someone wanting to feel more stable daily, these balance exercises can definitely make a big difference.

Ultimate Balance Exercises for Improving Stability and Strength


Maintaining good balance is essential for everyday activities and overall physical health. Balance exercises are designed to improve the body’s stability and help prevent falls and injuries while enhancing coordination and strength. Whether you’re an athlete looking to fine-tune your performance, a senior aiming to preserve independence, or somewhere in between, incorporating balance routines into your exercise regimen can provide substantial benefits.

As you prepare to embark on balance exercises, it’s important to start with a solid foundation. Simple activities such as standing on one foot or using a stability ball can lay the groundwork for more advanced exercises. Over time, these exercises can be augmented in complexity to continually challenge your body, aiding in better posture, stronger core muscles, and a heightened sense of bodily awareness. By progressively integrating balance workouts with other forms of training, you can help ensure a well-rounded fitness routine.

Key Takeaways


  • Balance exercises enhance stability, prevent falls, and can improve overall athletic performance.
  • Starting with fundamental exercises and progressing to more complex ones ensures a safe and effective balance training program.
  • Combining balance exercises with other types of training can lead to a more comprehensive fitness routine.

Fundamentals of Balance


Achieving balance is essential for your overall fitness and can prevent falls. It involves maintaining body position over your base of support both statically and dynamically.

Understanding Balance


Balance is your ability to maintain your body’s center of gravity within your base of support. Improved balance can lead to enhanced performance in sports, better posture, and a reduced risk of injury. It is a complex process that your sensory systems, including vision, proprioception, and the vestibular system, all contribute to its regulation.

Components of Balance Training


Balance training usually comprises two primary components: static balance and dynamic balance.


  • Static balance refers to maintaining equilibrium when you are stationary, such as standing on one leg.
  • Dynamic balance is the ability to remain balanced while in motion, for example, walking or playing sports.


Incorporating exercises such as standing on one foot or performing single-leg deadlifts can greatly enhance these components, providing you with stability and coordination for everyday activities and sports.

Preparation for Balance Exercises


Before starting any balance exercises, it’s important to ensure that you’re well-prepared to reduce any risk of injury and to get the most out of your stability training.

Safety Tips Before Starting


  • Consult with a Healthcare Provider: Always check with your healthcare professional to ensure balance exercises are safe for you, particularly if you have underlying health conditions.
  • Warm Up: Begin with a 5 to 10-minute warm-up to get your muscles ready for exercise, such as walking or light stretching.

Equipment and Space Requirements


  • Footwear: Wear proper footwear that offers good support and non-slip soles.
  • Clear Area: Ensure a clear, flat area to work out, removing any potential tripping hazards.
  • Stable Support: Have a sturdy chair or railing available for exercises that may require extra support.

Basic Balance Exercises


Balance is a crucial component of fitness, and enhancing it can improve your posture, coordination, and athletic performance. Here, we’ll explore a series of exercises designed to fortify your stability through controlled, targeted movements.

Static Balance Drills


Single-Leg Stand: Start by standing on one foot, holding the position for 30 seconds before switching to the other foot. For an additional challenge, close your eyes or stand on a cushion.

Tree Pose: Root one foot on the ground, press the sole of your other foot to the inner thigh, and balance for 30 to 60 seconds. Swap sides to ensure the development of balance skills is even.

Dynamic Balance Drills


Heel-to-Toe Walk: Take a step by placing the heel of one foot just in front of the toes of the other foot as if walking on a tightrope. Focus on a point ahead and take 20 steps.

Lateral Step-Overs: Set a small object on the ground and practice stepping over it laterally, moving side to side. This exercise combines balance with lateral movement, improving your dynamic stability.

Intermediate Balance Exercises


Engaging in intermediate balance exercises can significantly enhance your stability and proprioception. These drills are designed to challenge your body’s ability to maintain posture and coordination under varied and more demanding conditions.

Proprioception Enhancement Drills


Proprioception is your body’s ability to sense movement and position. It is crucial for everyday tasks and athletic activities alike. To improve this, try exercises like the single-leg balance reach. Stand on one leg, maintaining a slight bend in the knee. Reach forward or to the sides with your free hand, touching a target, such as a cone or a chair. Alternate between your left and right leg for sets of 10-15 touches.

Another effective drill is the BOSU ball squat. Standing on the rounded side of a BOSU ball, with your feet hip-width apart, perform squats while keeping your balance. This exercise forces your core and leg muscles to work overtime to stabilize your body. Aim for two to three sets of 10-12 squats.

Stability Challenges


Stability challenges involve exercises that push your balance to a higher level by adding movement and reducing the base of support. For an elevated challenge, try exercises like the half-moon pose from yoga, which entails balancing on one leg while hinging at the hip, lifting the other leg, and reaching the opposite hand downward.


Incorporate dynamic movement with the standing knee lift. Raise one knee to hip height while maintaining balance on the other foot. Hold the position for about 5 seconds before switching legs. For an extra challenge, add a small hop on the standing leg when switching sides. Perform this exercise for 1-2 minutes, focusing on maintaining a controlled and stable posture throughout the movement.

Advanced Balance Exercises


To advance your stability and coordination, incorporate sophisticated tools and techniques such as balance boards and Bosu balls. These exercises are designed to challenge your balance further, promoting greater strength and proprioception.

Balance Board Routines


Using a balance board is an effective way to enhance your ankle stability and overall balance. Typical routines involve standing on the board with both feet and shifting your weight to keep the board’s edges from touching the ground. This can help improve your core strength and the stabilizing muscles around your ankles.


  • Shift & Hold:
    1. Stand on the balance board, feet hip-width apart.
    2. Lean to the right, hold for two seconds, then center.
    3. Repeat to the left.


  • Circular Motions:
    1. Rotate the board in a circular motion, clockwise, then counter-clockwise.
    2. Maintain an even, controlled motion for 30 seconds each direction.

Bosu Ball Workouts


Bosu Ball exercises provide a dynamic surface to work on your stability and core strength. With the dome side up, the Bosu Ball creates an unstable platform for exercises, increasing the difficulty and engagement of the stabilizing muscles.


  • Bosu Squats:
    1. Stand on the dome side of the Bosu Ball with feet shoulder-width apart.
    2. Lower into a squat, keeping your balance, then rise back up.


  • Bosu Planks:
    1. Place your forearms on the dome side, extending your legs behind you.
    2. Hold a plank position, keeping your body in a straight line for 30 to 60 seconds.

Balance Exercises for Specific Populations


Designing a balance training program that caters to the needs of specific populations can maximize the benefits for stability and mobility. Here’s how you can incorporate targeted exercises into your routine if you’re a senior or an athlete.

Exercises for Seniors


Strengthening your balance can help prevent falls and maintain independence. Begin with simple exercises such as standing on one foot or walking heel to toe. These exercises don’t require equipment and can be performed at home with minimal space. Check the detailed guidance provided by Mayo Clinic for more ideas.


  1. Standing on One Foot: Start by holding onto a sturdy chair for support. Stand on one foot for up to 30 seconds, and then switch to the other foot.
  2. Walking Heel to Toe: Step forward, placing the heel of your foot directly in front of your other foot’s toes. Repeat this motion as if you are on a tightrope to enhance balance.

Programs for Athletes


Athletes require dynamic balance for optimal performance and reduced injury risk. Incorporating exercises such as single-leg squats and dynamic lunges into your training can be extremely beneficial. For specific exercises tailored to enhance athletic performance, visit Men’s Health.


  • Single-leg Squats: While standing on one leg, squat down while keeping the other leg extended out in front. Aim for a set of 10 repetitions on each leg.
  • Dynamic Lunges: Perform lunges in various directions – forward, backward, and side to side – to challenge and engage different muscle groups.


By integrating these exercises into your daily regimen, you can achieve improved balance and overall stability tailored to your specific life stage and activity level.

Integrating Balance Workouts with Other Training


Incorporating balance exercises into your existing training regimen enhances stability and can lead to better overall performance. Whether you’re lifting weights or doing cardio, integrating balance-focused movements can offer significant benefits.

Combining Balance and Strength Training


Strength training often focuses on muscle building and power. However, by adding a balance component, you also improve proprioception and stabilize the muscles responsible for keeping you upright. For instance, try performing a single-leg deadlift to engage your core and lower body simultaneously. This exercise not only targets muscle groups but also challenges your balance. Additionally, exercises like Bulgarian split squats can be seamlessly incorporated to provide both strength and balance training, ultimately enhancing your stability.

Incorporating Balance in Cardio Routines


Whilst engaging in cardio exercises, balance can be subtly included to elevate the workout. For example, incorporating a slow knee lift at the end of each lunge during a dynamic warm-up brings balance into play. Another effective approach is to utilize narrow stances or unstable surfaces like a BOSU ball during activities. By integrating balance challenges into your cardio, you can activate different muscle groups and improve neuromuscular coordination, which is beneficial for everyday movement and athletic performance.

Assessing Progress and Adjusting Difficulty


Evaluating your balance exercise routine is crucial to ensure you are continually challenging your body and improving your stability. This assessment involves tracking your progress and knowing when to adjust the difficulty of your exercises.

Tracking Improvements in Stability


To effectively track your stability progress, start by setting a baseline. Record how long you can maintain a balance pose without support and note the difficulty level of balance exercises you perform with ease. Over time, you should observe an increase in the duration you’re able to hold balance positions and a smoother execution of movements. Progress can also be measured by the reduced need for support when doing exercises such as standing on one leg or using a Bosu ball.

Progression and Regression Strategies


Once you track improvements, your workout routine should evolve. Progression means adding complexity to your exercises, like closing your eyes while balancing, adding movement or weights, or shifting to less stable surfaces. However, be mindful of regression, allowing for easier modifications or more support when faced with challenging days. For instance, using a focal point to maintain stability can be a simple yet effective regression strategy if you’re struggling to maintain balance during a workout session.

Did You Know?


David Weck invented the Bosu Ball in 2000. Initially, this name was an acronym for “BOth Sides Up,” wherein one side is a solid flat platform, and the other is a soft dome resembling an exercise ball. These days, the Bosu Brand attaches the meaning “BOth Sides Utilized” to the name.

Recovery and Maintenance


After incorporating balance exercises into your routine, it is crucial to focus on recovery and maintenance to enhance the benefits and reduce the risk of injury.

Cool-Down Stretches after Balance Training


It’s vital to perform cool-down stretches to relax your muscles and prevent stiffness post-balance exercises. Stretches such as hamstring stretches or calf stretches should be held for at least 15-30 seconds to ensure flexibility is maintained. For example, reach your hands toward the floor and hold when your back is parallel to the floor, as highlighted in Balance Improving Exercises for Workouts to Improve Stability.

Ongoing Balance Maintenance


Consistency is key in ongoing balance maintenance. Incorporate single-leg exercises, like a single-leg deadlift, which require you to maintain stability over a prolonged period. A varied routine promotes improvement and adaptation, which can be integrated into daily activities to keep your balance skills sharp. For further advice on integrating balance exercises, consider reviewing suggestions from Verywell Fit.

Transform Your Stability with Balance Exercises

Adding balance exercises for improving stability to my routine has made a world of difference. I’ve gone from feeling unsteady and unsure to confident and coordinated in my everyday movements. Starting with simple exercises like standing on one foot and progressing to more challenging routines on a BOSU ball, I’ve seen significant improvements in my posture, strength, and overall balance. Whether you’re looking to boost your athletic performance or simply stay steady on your feet, these exercises are a game-changer. Give it a try – start with the basics and see how quickly you progress. So, take the first step today and experience the benefits of improved stability for yourself!

Frequently Asked Questions


Balancing exercises are essential for improving stability, and here you’ll find targeted exercises for varying skill levels and ages, incorporating additional resistance, and options for home workouts.

What are the best balance exercises for beginners to enhance stability?

If you’re just starting out, try simple exercises like standing on one foot or doing a series of heel-to-toe walks. These foundational moves help you establish a baseline for your balance and can be performed almost anywhere.

Which exercises can improve balance for seniors effectively?

For seniors, low-impact exercises such as tai chi can be particularly beneficial. They promote stability and coordination and can also reduce the risk of falls.

How can incorporating weights into a balance routine increase stability?

Adding weights to your balance routine, like doing a single-leg deadlift with a dumbbell, challenges your muscles further and helps to strengthen the core and leg muscles that are critical for good balance.

What are some effective balance exercises that can be done at home?

Exercises that don’t require special equipment, such as side planks or single-leg standing exercises, can easily be done in the comfort of your home and are effective for improving balance.

What is the most effective training method for improving balance and stability?

Consistency is key in balance training. Incorporate balance exercises into your daily routine, whether it’s through a structured workout or simply standing on one leg while brushing your teeth.

What strategies can be used to correct or improve poor balance?

Begin with basic exercises and gradually increase difficulty as your balance improves. Ensure your workout space is safe, use supports like a chair when necessary, and focus on maintaining good posture throughout the exercises.

Discover Your Balance with Expert Tips at feet-relief.com!


Ready to enhance your stability and overall well-being? Visit our official website at feet-relief.com for expert tips, comprehensive guides, and the best tools to support your balance exercises. Discover how you can do so today!

Optimized by Optimole