Senior-Friendly Exercises For Foot Health

Senior-Friendly Exercises For Foot Health

Senior-friendly exercises for foot health are essential for maintaining mobility and independence as we age. As someone who has personally benefited from incorporating these exercises into my daily routine, I can attest to their positive impact. By targeting specific muscle groups and improving flexibility, balance, and strength, these exercises help alleviate common foot problems and reduce the risk of falls. In the following sections, we will delve into a variety of exercises suitable for seniors, along with tips on how to create a sustainable exercise routine.

Happy Feet, Happy You: Senior-Friendly Exercises for Foot Health

Foot health is a big deal for seniors, though it often flies under the radar. Maintaining healthy feet is not just about comfort—it’s about preserving mobility and staying active. As we age, our feet go through a lot, sometimes leading to issues like arthritis, neuropathy, and plantar fasciitis. These can slow you down and make moving around less fun.

Ignoring foot health might clip your wings, so to speak. When your feet aren’t happy, your overall well-being takes a hit. Things like walking, staying active, and even just feeling steady on your feet can become a real chore. Plus, foot pain and problems can lead to a knock-on effect, keeping you from getting out and about, which can add a layer of isolation and even mess with your emotional health.

So, why all the fuss about foot health? Well, having healthy feet plays a crucial role in staying steady and independent on your feet. This isn’t just about avoiding sore spots or bunions. It’s about keeping your independence and ensuring you can continue doing the things you love without discomfort or risk.

Keeping track of your foot health isn’t just a reactive measure. Being proactive with a little TLC can do wonders. Checking your feet regularly, wearing the right shoes, and even talking to a specialist when something feels funky all go a long way in keeping things shipshape. When you catch problems early, you avoid bigger issues down the line, letting you stay on your toes, literally and figuratively.

Preemptive care around foot health can seriously boost your quality of life in your golden years. So, while going through your healthcare checklist, make sure foot health gets the attention it deserves. After all, your feet are your foundational support, and they deserve just as much attention as the rest of you.

Key Takeaways:

  • Prioritizing Mobility: Senior-friendly exercises improve foot strength, flexibility, and balance, helping maintain mobility and independence.
  • Simple & Effective: Targeted foot exercises reduce pain, support balance, and prevent falls with minimal time commitment.
  • Consistency Matters: Routine care promotes long-term foot health, supporting active and comfortable daily living for seniors.

Effective Exercises to Boost Foot Health

Regular exercise is key to keeping your feet in top shape, especially as we age. It’s about establishing routines that anyone can tap into without the need for fancy equipment or a gym subscription. By building foot exercises into daily activities, you can ease tension, improve circulation, and keep those tootsies ticking along nicely.

Simple Foot Exercises

Simple movements make a big difference. Think heel raises, toe curls, and ankle circles. These exercises are easy to fit into a daily schedule and work wonders for maintaining strength and flexibility in your feet. By regularly exercising your feet, you minimize muscle stiffness and build strength, which helps prevent those pesky aches and pains.

Enhancing Balance and Stability

Routine foot exercises also support better balance and stability. This is especially important for seniors who want to minimize their fall risk. Incorporating exercises that enhance balance not only benefits your feet but also boosts overall body coordination.

Effective Short Workouts

The best part? You don’t have to slog through hours of exercise. Short, consistent bursts are highly effective. Even simple things like practicing standing on one foot while brushing your teeth can contribute a lot.

Long-term Benefits of Consistency

It might seem like a little change, but sticking to these exercises offers big rewards. As you settle into your routine, you’ll notice more ease and confidence in your movement, setting a solid foundation for maintaining independence and quality of life.

Simple Stretching Techniques for Better Foot Flexibility

Foot flexibility plays a huge role in maintaining foot health for seniors. Keeping those feet supple helps dodge unwanted injuries and keeps you light on your feet.

Starting with easy stretches can gradually improve the range of motion in your feet. Toe stretches, calf stretches, and even a good old towel stretch can do wonders. Simply sit, extend your leg, loop a towel around your foot, and gently pull.

These maneuvers are all about gently coaxing your muscles to stretch a bit further. It’s not about pushing to the pain point but feeling a nice stretch that releases tension.

Making these stretches part of your daily setup can prevent tightness and ward off muscle cramps. It’s like giving your feet a well-deserved treat, prepping them for whatever the day brings.

Consistency is key. Regular stretching sessions not only improve flexibility but can also undo some of the stiffness that naturally creeps in as we age. Just a few minutes each day can lead to noticeable improvements.

So, roll out that mat, grab a sturdy chair, and give those stretches a go. Incorporating these movements into your routine means you’re setting up your body for fewer restrictions and more freedom in movement.

Strengthening Exercises for Stronger Feet

Building strength in your feet is all about giving those muscles a good workout without overdoing it. Strong feet are less prone to injuries, making it easier to go about your daily activities without hiccups.

Some exercises focus on strengthening these muscles. Take toe raises, for instance—lifting your heels off the ground and balancing on your toes works wonders for foot strength. Then there are towel scrunches, using your toes to pull a towel toward you, which target the tiny muscles often overlooked.

Another winner is the marble pickup. Scatter some marbles in front of you and challenge your toes to pick them up one-by-one. It sounds simple, but it gives your feet a decent workout.

Adapting these exercises to match your ability level is crucial. Start slow, see what feels right, and gradually increase the intensity. The goal is progress, not perfection.

Many seniors who have regularly incorporated foot strengthening exercises into their routines report feeling more stable and comfortable while walking. It all boils down to acknowledging that strong feet support active living long into your senior years.

Balance and Coordination Exercises for Improved Stability

Boosting balance and coordination is a surefire way to improve overall foot health. For seniors, maintaining stability can mean the difference between living independently and facing frequent falls or accidents.

Exercises like standing on one foot, heel-to-toe walking, or practicing sitting down and standing up without using hands all contribute to better balance. These moves help the brain and muscles communicate more effectively, syncing your body’s movements.

Trying new exercises may feel challenging at first, but it’s important to persist through the initial wobbles. Consistency builds confidence. The more you practice, the easier it gets, and soon those tricky exercises won’t be so intimidating.

Finding simple, everyday moments to practice balance can make a significant impact too. For instance, balancing on one leg while waiting for the kettle to boil or doing heel-to-toe walks down the hallway can subtly incorporate balance practice into daily life.

Beyond physical stability, improving balance also boosts peace of mind. Knowing you can move confidently without fear of falling encourages you to stay active and engaged with the world around you.

Using Props and Tools to Enhance Foot Exercises

Adding props and tools to your foot exercise regime can give your routine a fun twist while enhancing effectiveness. Simple equipment like resistance bands, exercise balls, and balance boards offer additional challenges that keep workouts interesting and engaging.

Versatility of Resistance Bands

Resistance bands are versatile and can be used to strengthen various foot and ankle muscles by providing adjustable tension. Using a band around your forefoot adds resistance during toe flexing and pointing, intensifying the workout.

Benefits of Exercise Balls

Exercise balls are great for sitting exercises to bolster foot muscles. Rolling a ball under your foot helps with coordination and loosens tight muscles, making it a favorite for those needing gentle yet effective stretches.

Improving Stability with Balance Boards

Balance boards challenge your stability, making them perfect for improving balance while strengthening the core and feet simultaneously. Even a few minutes on the board can significantly enhance your coordination skills.

Choosing the Right Gear

Selecting the right gear is vital, so consider what’s feasible and safe for your fitness level. Start with beginner-friendly tools and progressively incorporate more complex ones as you gain confidence.

Safety First

Always prioritize safety. Use props in a controlled environment, preferably with something stable nearby to hold onto if needed. Consult with a healthcare provider to determine the most suitable exercises and tools for you.

Creating a Sustainable Exercise Routine for Long-Term Foot Health

Building a sustainable exercise routine is the key to long-term foot health and overall well-being. The goal is to incorporate exercises into your daily or weekly schedule without feeling overwhelmed.

Consistency makes a noticeable difference. Set a realistic plan that fits into your life and slowly increase the frequency as you get more comfortable with the exercises. Whether it’s morning stretches to kickstart your day or evening routines to wind down, find what suits your rhythm.

Motivation can sometimes wane, but finding enjoyment in your routine can keep you on track. Partnering up with a buddy or joining a senior exercise class adds a social element and a bit of fun to your exercises.

Collaborating with physical therapists or trainers allows you to personalize routines tailored to your needs and capabilities. They guide you safely and help track your progress, paving the way for improvements that stick.

These exercises are not only about immediate benefits but about building a foundation for greater mobility and independence in the future. Your feet work hard—keeping them fortified ensures you’re ready to tackle every step life throws your way.

Senior-Friendly Exercises for Foot Health: A Recap

In this guide, we’ve explored the importance of foot health for seniors and the many benefits of incorporating regular exercise into your routine. From simple stretches to targeted strengthening exercises, we’ve covered a range of techniques to improve flexibility, balance, and overall foot strength.

I’ve personally tried some of these exercises, and I can attest to their effectiveness. Heel raises, toe curls, and marble pickups are easy to do at home and have made a noticeable difference in my foot health.

Remember, consistency is key. Even small amounts of exercise each day can yield significant results. By prioritizing foot health, you’re investing in your overall well-being and ensuring a more active and comfortable life.

So, what are you waiting for? Start incorporating these exercises into your daily routine today!

If you have any questions or concerns, consult with a healthcare professional.

Frequently Asked Questions

We’ve compiled a list of frequently asked questions to address common concerns about foot health and exercise.

How often should I do these exercises?

It’s recommended to do these exercises at least 3-4 times a week, but even daily practice can be beneficial. However, listen to your body and avoid overexertion.

Are these exercises safe for people with arthritis or other foot conditions?

While these exercises are generally safe, it’s crucial to consult with a healthcare professional before starting any new exercise routine, especially if you have underlying health conditions. They can provide personalized guidance and modify exercises to suit your specific needs.

Can these exercises help prevent foot pain and discomfort?

Yes, regular foot exercises can help prevent and alleviate common foot problems like plantar fasciitis, Achilles tendonitis, and metatarsalgia. By strengthening the muscles and improving flexibility, you can reduce pain and discomfort.

Stay Active, Stay Connected!

Looking for more tips and tricks to stay fit after 55? Head over to our website, Fit After 55, for engaging content, product reviews, and a supportive community dedicated to helping you reach your fitness goals!

Join the conversation on our Facebook page, Fit After 55 Community, and connect with fellow fitness enthusiasts of all ages!

Tips For Preventing And Treating Foot Ulcers

Tips For Preventing And Treating Foot Ulcers

Preventing and treating foot ulcers is a topic I’ve become intimately familiar with, both through personal experience and helping loved ones manage this condition. While they might seem like a minor issue, foot ulcers can have serious consequences if left untreated.

Preventing and Treating Foot Ulcers: Essential Steps for Healthy Feet

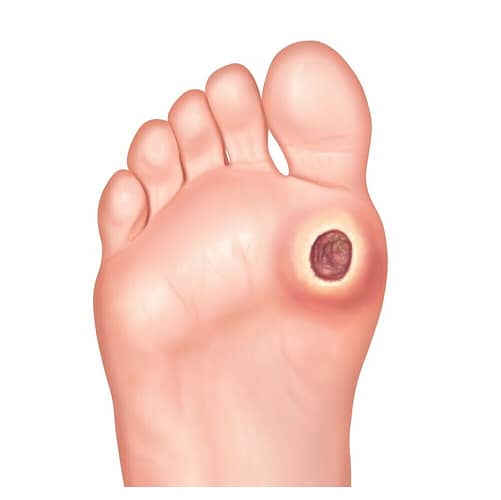
Foot ulcers might not be dinner-table conversation, but they’re pretty important if you’re looking to keep your feet happy and healthy. Foot ulcers are basically open sores on your feet or toes that refuse to go away, and they’re not just a minor inconvenience. Left unchecked, they can cause bigger issues like infections or even lead to amputations.

The causes of foot ulcers can be as varied as the people who experience them. You’ve got diabetes, poor blood circulation, and nerve damage (a.k.a. neuropathy) sitting at the top of the list. Neuropathy can sneak up on you if you’ve got diabetes because it damages the nerves responsible for feeling pain, making it tough even to notice something’s wrong till it’s too late.

Risk factors are kind of like a checklist of things to look out for. Age, body weight, and pre-existing conditions like heart disease or kidney problems all bump up your chances of getting stuck with a foot ulcer. It’s like your feet are shouting a call for help, only it’s in Morse code!

The secret weapon in your foot care arsenal is early detection. Spotting an ulcer early means you can jump on treatment fast, which is crucial for nipping it in the bud before it gets troublesome. Regular foot checks—either by yourself or a healthcare professional—are a game-changer. A little time spent with your feet today could save you a whole lot of hassle tomorrow.

Key Takeaways on Foot Ulcers

  • Know the Risks: Foot ulcers often result from diabetes and neuropathy. Early signs like redness or swelling should prompt self-checks.
  • Prevent with Care: Good foot hygiene, proper footwear, and regular check-ups can help prevent ulcers.
  • Act Quickly: Timely treatment, including wound care and possibly advanced therapies, is crucial for healing.

Essential Tips for Preventing Foot Ulcers

Foot hygiene might sound like something only your grandma talks about, but keeping your feet clean and dry is like basic maintenance for your car—neglect it, and you’re asking for trouble. Not just washing, but really getting between those toes, drying them thoroughly, and chucking on some moisturizer can keep the skin soft and less prone to cracking.

Choosing the Right Footwear

Footwear matters more than you might think. Those fancy shoes might turn heads, but they also might be squeezing your feet where they shouldn’t. Opt for shoes that provide room and support, maybe something with a bit of cushioning to absorb the shocks of everyday life. Shop for shoes in the afternoon when your feet are naturally a bit swollen; it’s a minor detail that makes a big difference.

Regular Foot Check-ups

Regular check-ups with someone who knows feet like the back of their hand is like having a relationship with your mechanic—you want them to spot issues before they become costly problems. A healthcare provider specialized in foot care can catch potential problems early and help tailor a care plan specific to your needs.

Embracing a Healthy Lifestyle

A healthy lifestyle is another step in the right direction. Think of it as a holistic approach. Managing your blood sugar levels, cutting down on fried foods, and moving more are all in the game plan. If you smoke, it’s time to consider quitting. Smoking messes with your blood circulation, making it harder for your body to heal itself.

Being Proactive with Health

Being proactive with your health, especially if you’ve got diabetes or other underlying conditions, changes the game. Regular monitoring of your condition is the name of the game here, keeping everything in check to prevent those ulcers from showing up in the first place.

Recognizing Early Signs and Symptoms of Foot Ulcers

Foot ulcers can be sneaky, so knowing what to watch for is crucial. Starting with what’s right under your nose—or in this case, your feet—any sudden redness or swelling should raise a flag. An unusual warm spot on the foot can also mean trouble’s brewing, even if there’s no open sore yet.

Pain might seem obvious, but with conditions like neuropathy, it might be a lack of pain that’s worrisome. If you usually have sensation and suddenly don’t, it’s a hint that something’s up. A little throbbing pain that seems out of place can also be a warning sign that an ulcer might be forming.

Getting into the routine of daily self-examinations is like brushing your teeth. Quick and daily means problems are less likely to stick around. Look out for cuts, blisters, or any changes in the skin. Using a mirror or getting help from a friend is helpful if you can’t see everything on your own.

Escalate things to a professional if your home detective work uncovers something suspicious. Medical experts can offer tests and use tools we simply don’t have at home—like ultrasounds or blood tests—to pinpoint the underlying issue.

Tools like a foot mirror or apps designed to remind and track changes can be your best friend. You can even keep a little foot diary to note any changes over time, giving your doctor valuable info when you see them next.

Effective Treatment Options for Foot Ulcers

Once an ulcer appears, addressing it promptly is essential. Tackling foot ulcers takes a mix of professional care and personal vigilance. Medical treatments span a range from simple to high-tech, but starting with the basics is key.

Wound Care Basics

Wound care tops the list. Keeping the ulcer clean and covered is paramount. Use sterile dressings and follow your healthcare provider’s advice on changing them. This prevents infection and encourages the healing process.

Managing Infections

When infections rear their ugly heads, antibiotics come into play. Whether oral or topical, they help clear infections out of the way, paving the path for your skin to heal without interference.

Advanced Treatment Options

In more advanced cases, you might find yourself exploring options like hyperbaric oxygen therapy. This involves breathing pure oxygen in a pressurized room, aiding faster healing. Though it might sound futuristic, it’s been a reliable treatment for severe ulcers.

Considering Skin Grafts

Skin grafts can also be a game-changer in persistent cases. They involve transplanting skin, either your own or from a donor, to the ulcer area to encourage healing. Chat with your healthcare provider about these options if you’re hitting bumps in the healing road.

Living with and Managing Foot Ulcers

Managing foot ulcers day-to-day can seem daunting, but establishing a practical routine makes it far more manageable. A morning and evening routine for foot care, like self-checks and dressing changes, ensures you’re actively monitoring any changes.

Eating well is more than just a diet trend. A balanced diet, rich in vitamins and nutrients, supports your body’s natural healing process. Integrating foods like fruits, vegetables, and lean proteins can give your body the tools it needs to repair itself.

Mental health can sometimes get sidelined when dealing with physical health issues, but staying mentally well is just as critical. Finding support from others dealing with similar issues can be uplifting. Whether through in-person groups or online communities, connecting with those who understand can provide peace of mind.

Success stories from others who have effectively managed their ulcers might sound cliché, but they offer valuable insights and inspiration. Learning what works—how others build routines or the lifestyle changes they’ve made—can motivate you and show that it’s possible to live well despite the challenges.

It’s about progress, not perfection, so celebrate small victories as you make strides in managing your condition. It’s easy to get discouraged, but recognizing each step forward helps keep your spirits up as you continue on this health journey.

Preventing and Treating Foot Ulcers: Your Path to Healthy Feet

In conclusion, preventing and treating foot ulcers is essential for maintaining overall foot health and well-being. By understanding the risk factors, practicing good foot hygiene, and seeking timely medical attention, you can significantly reduce your risk of developing these painful and debilitating wounds. Remember to regularly inspect your feet for any signs of redness, swelling, or open sores. If you have diabetes or poor circulation, it’s crucial to prioritize foot care and work closely with your healthcare provider to develop a personalized treatment plan.

Thank you for taking the time to learn more about foot ulcers. We hope this information empowers you to take proactive steps towards maintaining healthy feet for yourself and your loved ones. By making small changes to your daily routine and seeking appropriate medical care, you can prevent and effectively manage foot ulcers.

Frequently Asked Questions

Preventing and treating foot ulcers is a critical aspect of maintaining healthy feet, especially for those at higher risk. Knowing the causes, practicing prevention, and understanding treatment options can make a significant difference. Here are some frequently asked questions to help you navigate this journey to healthier feet.

What causes foot ulcers, and who is at risk?

Foot ulcers can result from various factors, including diabetes, poor circulation, and nerve damage (neuropathy). People with conditions like diabetes, heart disease, or kidney issues, and those who are older or overweight, are at higher risk.

How can I prevent foot ulcers from forming?

Preventing foot ulcers involves maintaining good foot hygiene, wearing supportive footwear, conducting daily foot checks, and scheduling regular appointments with a healthcare provider. A healthy lifestyle, including blood sugar control and quitting smoking, can also reduce risks.

What are the treatment options if I already have a foot ulcer?

Treatment for foot ulcers typically includes wound care, antibiotics for infection, and in advanced cases, therapies like hyperbaric oxygen or skin grafts. Early detection and medical guidance are essential for effective healing and to prevent complications.

Stay Empowered in Foot Health and Fitness!

As you take steps to prevent and treat foot ulcers, it’s essential to have the right support and resources. Join our community for engaging content, expert product reviews, and tips focused on elderly fitness and overall well-being. Visit our official site and connect with us on Facebook to stay informed and motivated on your health journey!

Yoga Poses for Strengthening and Stretching the Feet

Yoga Poses for Strengthening and Stretching the Feet

Yoga Poses for Strengthening and Stretching the Feet

Yoga is a practice that not only benefits the mind and core body muscles but also targets smaller, often-neglected areas such as the feet. Incorporating yoga poses that focus on strengthening and stretching the muscles, tendons, and ligaments in the feet can enhance overall foot health, reducing the risk of injuries and improving balance and stability. Understanding the complex anatomy of the foot is the first step in recognizing how yoga can contribute to stronger, more flexible feet. Feet issues? Try Yoga Poses for Strengthening and Stretching the Feet.

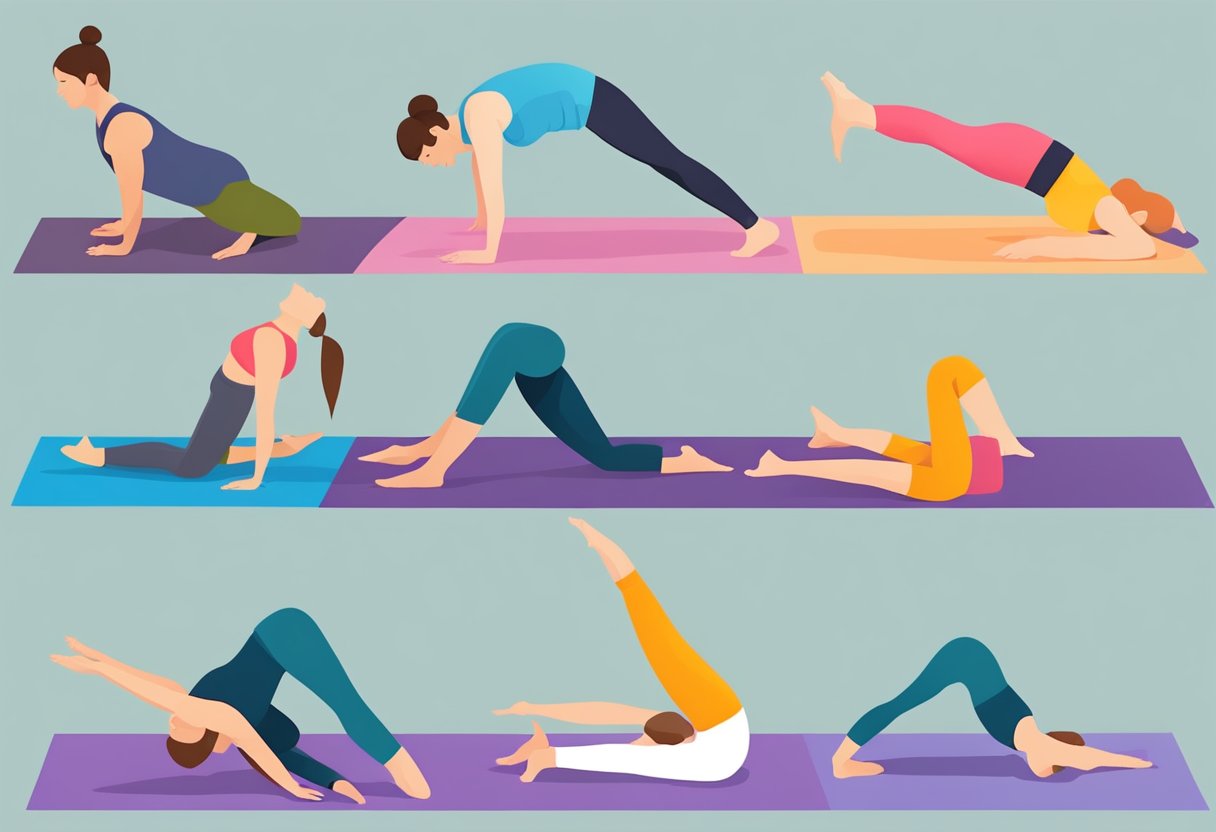
Feet in various yoga poses, such as downward dog or warrior, stretching and strengthening on a yoga mat

Before engaging in targeted foot exercises, it’s crucial to warm up adequately to prepare the body for more intensive stretching and strengthening. Just like any other part of the body, the feet need to be eased into practice to prevent strain or injury. Both basic and advanced yoga poses can be utilized to build the strength and flexibility of the feet, while restorative poses aid in releasing tension and promoting relaxation and recovery. Implementing a routine inclusive of foot-focused yoga poses can have long-lasting benefits for physical conditioning, not just for your yoga practice but for your daily activities as well.

Key Takeaways

Understanding Foot Anatomy and the Importance of Strength and Flexibility

Your feet are a complex structure designed to provide support, balance, and mobility. They consist of 26 bones, over 30 joints, and more than 100 muscles, tendons, and ligaments. This intricate design allows your feet to bear the weight of your entire body. To maintain foot health, both strength and flexibility are vital.

Strength is crucial for:

To develop strength in your feet, incorporate yoga poses that require you to balance on one foot, like the Tree Pose, or that involve spreading and lifting your toes.

Flexibility helps with:

  • Preventing injuries
  • Ensuring proper alignment
  • Facilitating a full range of motion

Stretching exercises and yoga poses like toe separators can improve your feet’s flexibility.

Remember, your feet are the foundation for all standing yoga postures. Maintaining their strength and flexibility is not just critical for your yoga practice but also for your overall well-being. Regularly including foot-specific yoga sequences into your routine can significantly enhance the stability and mobility of your feet.

Essential Warm-Up Exercises Before Practicing Yoga

A person's feet positioned on a yoga mat, stretching and strengthening through various yoga poses

Before diving into your Yoga Poses for Strengthening and Stretching the Feet, it’s crucial to prepare your body to prevent injury and to enhance your overall experience. Start with a warm-up routine focusing on mobility and gentle stretching to get the blood flowing to your muscles and joints.

  • Child’s Pose (Balasana): Begin on all fours, then lower your hips back to your heels, and stretch your arms forward. This pose relaxes your lower back and stretches the feet.
  • Mountain Pose (Tadasana): Stand with your feet together, toes spread wide. Feel the balance and grounding through your feet, which will form the foundation for your practice.

For your feet, in particular, perform these targeted exercises:

  1. Toe Stretch:
    • Sit with your knees bent and toes curled under.
    • Gently press into the toes to stretch the foot’s underside.
  2. Ankle Rolls:
    • Lift one foot, roll the ankle clockwise for a few breaths, then switch to counterclockwise.
    • Repeat with the other foot.

Remember to take slow, deep breaths and allow your body to ease into each movement. Aim for about 5-10 repetitions of each ankle roll per foot. Being mindful of these details will set a positive tone for your session and could greatly improve your focus on foot strengthening and stretching during your yoga practice.

Basic Yoga Poses for Foot Strengthening

When practicing yoga, your feet form the foundation of many postures, making foot strength crucial for balance and stability. Here are some basic poses aimed at improving the strength of your feet:

  • Mountain Pose (Tadasana): This pose may seem simple, but it’s an effective way to build a connection with the ground. Ground down through the soles of your feet, evenly distributing your weight and engaging the muscles in your legs and feet. This foundational stance sets the tone for foot strength.
  • Downward Facing Dog (Adho Mukha Svanasana): This well-known pose not only stretches your hamstrings and back but also strengthens your feet as you press through your heels, aiming to reach the mat.
  • Warrior Pose (Virabhadrasana): All variations of the Warrior Pose require balance and strength from the feet. Focus on stabilizing yourself through the foot of your front leg, with your weight evenly spread across the heel and balls of the foot.
  • Toe Squat: From kneeling, tuck your toes and sit back on your heels. Your body weight creates resistance, helping to strengthen your toes and the arches of your feet.
  • Thunderbolt Pose (Vajrasana): By sitting back on your heels with the tops of your feet stretched out on the floor, you engage and reinforce your foot muscles, especially if maintaining the pose for several breaths.

Incorporate these poses into your yoga practice regularly to build and maintain foot strength. Remember, balance and precision in these poses can help improve overall foot health and support your yoga journey.

Advanced Yoga Poses for Enhancing Foot Strength

To increase strength in your feet, practicing certain advanced yoga poses can be highly beneficial. Given the complex structure of the foot, which includes bones, muscles, and ligaments, these poses aid in improving both flexibility and stability, which are vital for balance and overall foot health.

Vasisthasana (Side Plank Pose): This pose requires you to balance on one arm and the outside of one foot, helping to strengthen the muscles along the side of the foot and ankle.

  • Begin in a traditional plank position.
  • Shift your weight onto your right hand and outer right foot.
  • Stack your left foot on top of the right with your legs straight.
  • Extend your left arm up towards the sky.

Natarajasana (Dancer’s Pose): A test of balance, this pose encourages concentration and strengthens the small muscles in your feet.

  • Stand on your right foot, bend your left knee and grab the inside of your left foot with your left hand.
  • Stretch your right arm forward for balance, as you push your left foot into your hand, lifting it up and back.

Padangusthasana (Big Toe Pose): This forward bend engages the toes and stretches the muscles and tendons of the feet.

  • Stand upright, then hinge at the hips to fold forward.
  • Catch your big toes with your index and middle fingers.
  • Pull up on your toes as you press the balls of your feet down.

For descriptions of practicing these poses and additional foot-strengthening sequences, the resources provided by Yoga Journal can be invaluable. Remember, consistency is key, and careful attention to technique will ensure the best results.

Yoga Poses Focused on Foot Stretching

Practicing yoga can greatly benefit the health of your feet, which are fundamentally important for balance and alignment. To focus on stretching your feet, include these effective poses in your routine.

  • Downward Facing Dog Pose: Essential for stretching the feet, especially the plantar fascia. Begin on all fours, tuck your toes, lift your hips, and press back into an inverted “V” shape. Push your heels towards the ground for a deep stretch.
  • Mountain Pose: A subtle but effective foot stretcher. Stand upright with your feet together and firmly plant them on the ground. Lift your toes, spread them apart, and then press them back down to enhance the stretch in the arches.
  • Thunderbolt Pose: Sit on your heels with your knees bent and hands resting on your thighs. Your toes will be stretched, and as you shift your weight back slightly, the stretch intensifies. Hold this position for a minute or more for a thorough foot stretch.
  • Extended Hand to Big Toe Pose: A challenging balance that not only stretches your feet but also your legs and improves stability. Stand on one foot, hold the big toe of the other foot with your hand, and stretch the held foot forward, keeping your spine long and chest open.

Incorporating these poses into your yoga practice can lead to increased flexibility and strength in your feet. For more detailed instructions and benefits, check out the focused approaches on Yoga Journal and techniques from Well+Good. Remember to approach each pose mindfully and within your comfort level to avoid any strain or injury.

Sequences and Flows for Comprehensive Foot Workouts

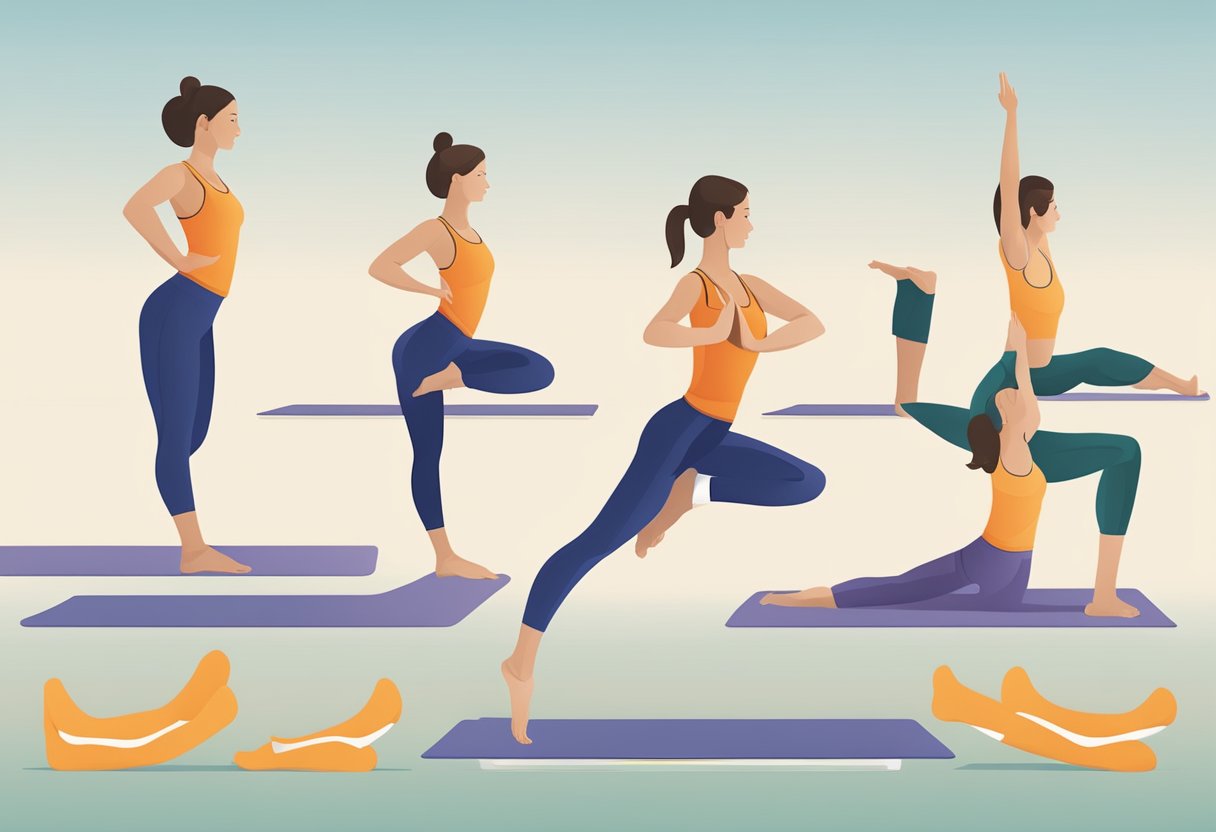
A series of yoga poses showcasing foot exercises and stretches in a flowing sequence

To bolster your foot strength and flexibility, engage in yoga sequences designed to target the feet. By practicing these specific flows and poses, you can enhance your balance and build a robust foundation.

Yoga Poses for Strengthening and Stretching the Feet

Key Poses to Incorporate:

  • Toe Spread and Squeeze: Spread your toes wide, then squeeze them together. This simple motion helps to increase control over your toe muscles.
  • Heel Raises: Transitioning from flat feet to tiptoes strengthens your foot arches and calves.

Flow Sequence:

  1. Mountain Pose: Ground your feet. Focus on evenly distributing your weight.
  2. Downward-Facing Dog: Elevate your hips to stretch your feet’s soles.
  3. Warrior I to Warrior III: Move through these poses to challenge your balance and foot stability.

Yoga sequences for strong feet can emphasize transitions that promote foot strength, such as from standing poses to one-legged balances.

Foot-Specific Exercises:

  • Foot Rolls: Use a tennis ball underfoot to massage and release tension.
  • Ankle Rotations: Clockwise and counter-clockwise to improve ankle mobility.

Incorporating a combination of static poses and dynamic movements in your practice will yield the best results for foot health. Visit 10 Yoga Sequences for Strong Feet and Better Balance for guided practices and further instruction. Integrating these techniques regularly into your routine will strengthen and stretch your feet, improving your overall yoga practice.

Restorative Yoga Poses to Relieve Foot Tension

When your feet feel weary after a long day, restorative yoga can help alleviate the tension. Try these poses aimed specifically at easing your foot discomfort.

Reclining Hand-to-Big-Toe Pose
With the assistance of a yoga strap, perform Reclining Hand-to-Big-Toe Pose to stretch and relax your feet. Lie on your back and loop the strap around your foot. Straighten your leg to a comfortable position and hold for a few minutes before switching to the other foot. This pose encourages blood circulation and stretches the muscles on the soles of your feet.

  • Toe Squat
    Enter a kneeling position and curl your toes under, sitting back on your heels. Hold this pose for 1-2 minutes to stretch the plantar fascia and the toes. Release gently if you feel any sharp pain.
  • Legs Up the Wall
    Position yourself with your legs extended up a wall while lying on your back. Support your lower back with a bolster or folded blanket. Remain in this pose for 5-10 minutes. The elevation helps in reducing swelling and fatigue in the feet.

Supported Bridge Pose
Place a yoga block or bolster under your sacrum in a supported bridge position, allowing your feet to rest comfortably on the mat. This pose can soothe tired feet and also release tension in the lower back.

Remember to breathe deeply and focus on the sensation of relief in your feet as you transition through these poses. Each restorative posture is designed to help decompress and bring restful awareness to your feet.

Tips for Safe Practice and Preventing Injury While Strengthening Feet

When engaging in yoga poses aimed at strengthening and stretching the feet, it’s important to practice safely to prevent injury. Here are some tips to keep in mind during your practice:

  1. Warm Up Properly: Before diving into foot-specific poses, ensure that your entire body is warmed up. This increases circulation to your feet, preparing them for exercise.
  2. Mind Your Alignment: Maintaining proper alignment is crucial. Your knees and feet should be in line, as this helps distribute your weight evenly and prevents undue stress on your feet.
  3. Don’t Overstretch: Pay close attention to the sensations in your feet. If you feel pain or excessive strain, ease up. It’s better to gradually build flexibility than to force your feet into positions.
  4. Use Props for Support: Props like yoga blocks or straps can provide additional support and help you achieve the right posture without overexertion.
  5. Build Strength Gradually: As with any strength training, start with simpler poses and progress to more challenging ones over time. This incremental approach develops sustainable foot strength.
  6. Cool Down: After your session, perform stretches to relax the muscles in your feet, like the toe squat or foot stepover, which aid in recovery.
  7. Stay Consistent: Regular practice yields the best results. However, listen to your body and take rest days as needed.

Remember, everyone’s body is different, and these tips are not a substitute for professional advice. If you have pre-existing conditions or feel unsure about a pose, consult with a yoga instructor or healthcare professional. Your safety is paramount in your journey towards stronger, more flexible feet.

Integrating Foot Yoga Poses into Your Daily Routine

Incorporating foot yoga into your daily regimen can enhance your balance and fortify the muscles in your feet. Start by setting aside just a few minutes each day, gradually building a routine that fits seamlessly into your lifestyle.

Morning Activation: Upon waking, before even getting out of bed, flex and point your toes. These simple motions awaken the feet and can be a gentle start to your day. Consider practicing toe separation exercises, which can improve your toe’s dexterity.

Midday Pick-me-up: Take a short break from work or activities to stretch your feet. A discreet and effective pose is the Toe Squat, which entails kneeling and then tucking your toes under, sitting back on your heels to stretch the soles and toes of your feet. Hold this toe stretch for 30 seconds to a minute for a refreshing midday revival.

  • Desk Work: While sitting, roll a small ball under each foot. This can help release tension and improve circulation, especially if you spend long hours stationary.

Evening Wind-down: As part of your evening routine, integrate more restorative foot poses. The Reclined Hero Pose or Vajrasana variation can aid in stretching the tops of the feet and ankles.

Time of Day Yoga Pose Duration Benefit
Morning Toe Flexion & Extension 2-3 mins Activation and Awareness
Midday Toe Squat 1-2 mins Tension Release, Flexibility
Evening Reclined Hero Pose 3-5 mins Stretching, Relaxation

Remember to listen to your body and avoid overexerting your feet. With consistent practice, these yoga poses can become building blocks for healthier feet, enhanced balance, and overall well-being.

Frequently Asked Questions

Yoga Poses for Strengthening and Stretching the Feet

Yoga can significantly enhance your foot health, providing strength, flexibility, and pain relief through targeted poses and stretches. The following FAQs address common concerns and the most effective yoga practices for feet.

What are the best yoga poses to promote foot strength?

To build foot strength, you can start with poses such as Toestand, which can improve your balance and core strength, along with stability in your ankles and hips.

Which yoga exercises can help alleviate plantar fasciitis?

Yoga exercises that stretch the plantar fascia and strengthen foot muscles, like toe curls and arch lifts, can be beneficial for alleviating plantar fasciitis.

How can yoga be used to stretch and relieve foot and calf tension?

Poses like Downward-Facing Dog can stretch and relieve tension in your feet and calves. Incorporating heel lifts and ankle rotations into your practice can also promote flexibility and reduce tightness.

Can practicing foot yoga assist in reducing bunions?

While yoga cannot cure bunions, it can help manage their symptoms. Gentle stretching and strengthening exercises for your feet might improve alignment and offer bunion relief.

What are the benefits of incorporating toe stretches in a yoga routine?

Incorporating toe stretches can increase your toes’ flexibility and strengthen the muscles in your feet, which may enhance overall balance and stability in your yoga practice.

Are there specific yoga poses that target flexibility and muscle tone in the feet?

Yes, Extended Triangle Pose is one of many yoga poses that can target both flexibility and muscle tone in the feet. Various standing and balancing poses also engage the feet and contribute to stronger, more flexible muscles.


You Might Also Like

Tips For Practicing Self-Care For Your Feet


Foot Arch Pain Exercises: Effective Relief


Foot Arch Pain Exercises: Effective Relief Strategies for Sore Feet


Calf Stretches for Foot Health: A Comprehensive Guide


The Benefits of Toe Yoga: A Guide to Enhancing Foot Health


Strengthening Exercises for the Arch of the Foot

The arch of the foot plays a crucial role in your overall foot health, affecting balance, gait, and posture. Strengthening the arch can lead to improved foot function and prevent injuries. Whether you’re an athlete looking to enhance performance or someone facing foot pain due to fallen arches or flat feet, exercises targeting the arch can be beneficial. Building arch strength can alleviate discomfort, provide better support for your body, and contribute to a more active lifestyle.

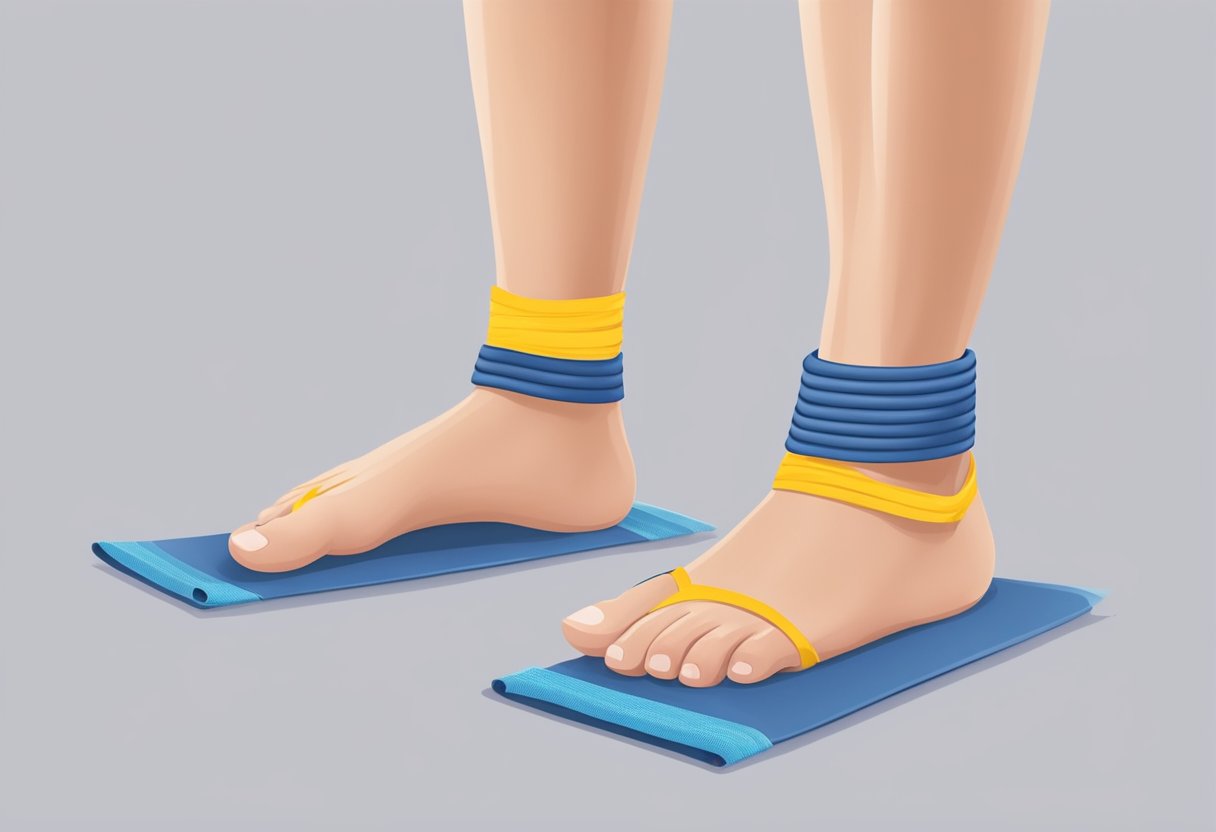
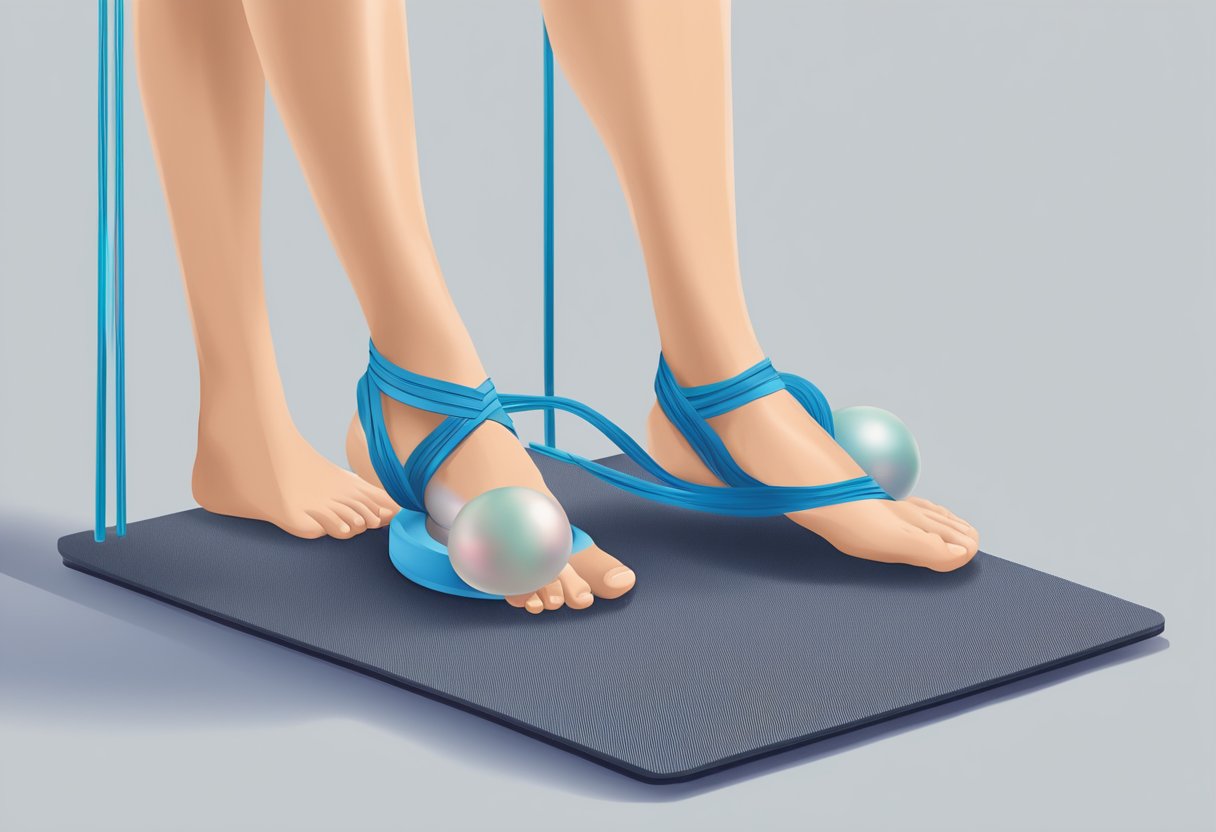
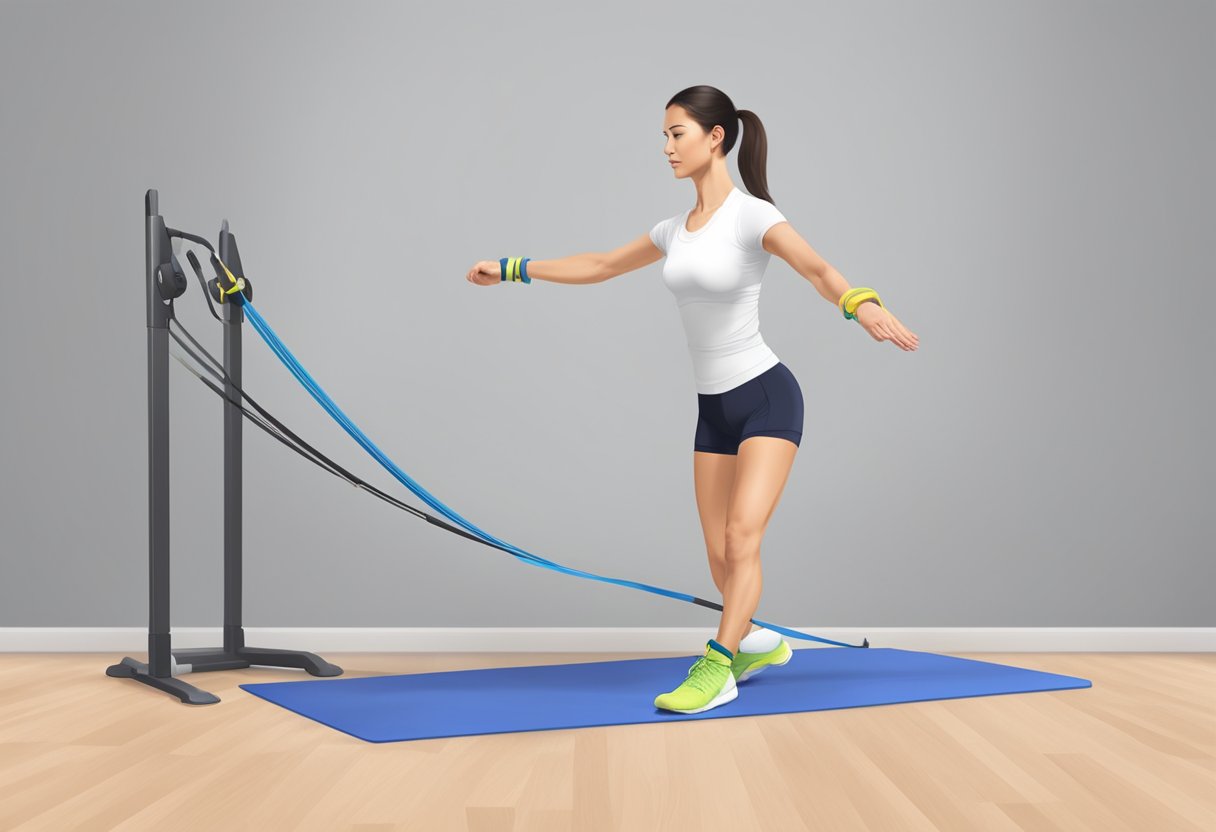
The foot is flexed and pointed, with resistance band wrapped around the arch. Ankle is held stable as foot pushes against resistance

Beginning an exercise regimen for your foot’s arch should be approached with an understanding of your current foot health. Knowing the anatomy of your foot and assessing your arch’s strength can greatly influence the effectiveness of your exercise routine. Simple exercises can be done at home with minimal to no equipment, while more advanced techniques and exercises may incorporate tools like resistance bands or stability balls to further challenge the muscles supporting the arch.

Key Takeaways

  • Strengthening the foot arch can improve balance and prevent injuries.
  • Assessing arch health is crucial before starting exercises.
  • Exercise progression from basic to advanced techniques enhances arch strength.

Anatomy of the Foot Arch

A foot with toes spread wide, pressing into a resistance band. Another foot flexes against a rolled towel, toes gripping. Ankle flexes with a resistance band

Your foot arch is a complex and critical structure that plays a key role in your overall foot health and function. It is made up of bones, ligaments, and muscles that work together to allow your foot to support the weight of your body while providing flexibility and movement.

Bones: There are three main bones that form the arches of your foot:

  • Talus: Sits above the heel bone and forms the ankle.
  • Calcaneus (heel bone): The largest foot bone that forms the heel.
  • Metatarsals: Long bones at the front of your foot.

Ligaments: Think of ligaments as strong bands that hold the bones together and provide stability. Prominent ligaments in the foot arch include:

Muscles: Your foot contains intrinsic and extrinsic muscles. The intrinsic muscles are located within the foot and are responsible for fine motor control, while the extrinsic muscles originate in the lower leg and are attached to the foot through tendons. Important muscles and tendons for the arch include:

  • Posterior tibial tendon: Supports the arch.
  • Anterior tibial tendon: Allows you to lift your foot.
  • Peroneal tendons: Stabilize the foot and protect the arch.

Ideal maintenance of this intricate system is crucial for your mobility and comfort. Regular exercises can strengthen these components, helping to prevent or alleviate problems such as fallen arches or plantar fasciitis.

Benefits of Arch Strengthening

Strengthening the arches of your feet is critical to your overall foot health. The benefits are numerous and can lead to improved foot function in several ways:

  • Support and Stability: A stronger arch helps support the body’s weight, enhancing stability and balance. Your arches act as natural shock absorbers, and reinforcing them can lead to improved performance in activities that require agility and coordination.

  • Injury Prevention: By engaging in exercises to strengthen the arch, you’re less likely to experience common foot injuries. This preventative measure is particularly important for athletes or individuals with a history of foot problems.

  • Pain Relief: Many foot-related discomforts, such as plantar fasciitis and heel pain, can be alleviated by strengthening the muscles around the arch. Stronger arches can also help in reducing the strain on the Achilles tendon.

  • Improved Posture: Your feet are the foundation of your body. A stronger arch contributes to better alignment of your legs and spine, promoting better posture overall.

  • Enhanced Foot Mechanics: Strengthening your arch can improve the mechanics of how you walk and run, potentially leading to increased efficiency and reduced fatigue in your lower extremity muscles.

Incorporating arch-strengthening exercises into your daily routine is simple and can provide long-term benefits. For example, the Short Foot Exercise is highly effective, as it targets the small muscles that support the arch, and can be done almost anywhere without the need for special equipment. Remember, just like any other part of your body, the muscles in your feet need exercise to remain strong and perform their best.

Assessment of Arch Strength

Proper assessment of your arch strength is the foundation for a successful foot strengthening routine. Begin by inspecting your foot architecture—notice if you have a well-defined arch, flat feet, or high arches. This visual check provides a preliminary understanding of your foot type.

Visual Inspection:

  • Stand barefoot and observe your arch in a mirror.
  • Note whether the inner part of the foot is lifted off the ground or if it’s flat against the surface.

Wet Test:

  • Wet your feet and step onto a dry surface to imprint your foot shape.
  • A complete imprint may indicate low arches, while a missing section in the inner foot suggests higher arches.

Manual Testing:

  • Attempt to move the arch muscles by flexing them without curling your toes.

For a quantitative measure, perform the Single-Leg Heel Raise:

  1. Stand on one foot.
  2. Rise onto your toes.
  3. Count the number of heel raises you can do before fatigue sets in.

An indicator of good arch strength is the ability to complete this exercise without pain or cramping and perform multiple repetitions with ease.

Engage in Static Arch Testing:

  • Press your foot flat on the ground.
  • Try to lift the arch while keeping your toes and heel on the floor.

Each of these assessments targets the ability of your intrinsic foot muscles to support your arches. Remember, consistent practice and gradual progression in exercises are key to improving your foot strength.

Starting with Basic Exercises

Beginning to strengthen the arch of your foot can be as simple as incorporating a few key exercises into your routine. These foundational movements help to build up the smaller intrinsic muscles of the feet, as well as improve overall foot mechanics.

Toe Presses

Toe Presses activate the muscles of the arch. Find a stable surface and stand upright. Progressively press your toes downward into the floor while keeping your heel in contact with the ground. Hold the press for a few seconds, then release. Repeat for 10–15 times for each foot.

Heel Raises

Heel Raises are essential for engaging the entire foot and improving ankle stability. Start with your feet hip-width apart. Gradually lift your heels off the ground, rising onto your toes. Ensure that the pressure is evenly distributed across all toes. Hold this position briefly at the top before lowering back down. Aim for 2 sets of 10 repetitions.

Arch Lifts

Finally, Arch Lifts will target the arch directly for strengthening. While standing, keep your toes flat on the floor and attempt to raise only the arch of your foot, creating a small gap between the floor and your arch. Do not roll to the outer sides of your feet. Hold the lift for a couple of seconds, then relax your arches. Perform 2 sets of 10 lifts for each foot.

Intermediate Strengthening Techniques

After mastering basic exercises for the arch of your foot, it’s time to elevate your routine with intermediate techniques. These strengthening exercises are designed to build upon your foundational strength and enhance the stability of your foot arches.

Towel Curls

To further develop the muscles in your feet, towel curls are an excellent intermediate exercise. Place a towel flat on the floor and sit on a chair with your feet on the edge of the towel. Using just your toes, scrunch the towel towards you, hold for a few seconds, and then release. This action mimics the natural gripping motion your feet employ when walking.

  • Frequency: Aim to perform 3 sets of 15 curls with each foot.

Toe Splay

Toe splay exercises work on the muscles that control toe movement. Sit comfortably and rest your feet flat on the ground. Without straining, spread your toes apart as much as possible, hold the position for a moment, and then relax your toes back to the starting position.

  • Repetitions: Complete 10-15 repetitions per set.
  • Sets: Do 2-3 sets per session.

Through these exercises, your feet will gain better mobility and strength, which is crucial for supporting your arches.

Advanced Exercise Progressions

After establishing a foundation of foot strength, you can challenge your foot arches with advanced exercises that promote balance and power.

Single-Leg Stands

Begin by standing on a stable surface on one foot. Hold this position for one minute, ensuring that your planted foot maintains a strong arch. As your stability improves, progress to balancing on an unstable surface such as a foam pad or a balance disc. This progression will further challenge your intrinsic foot muscles and improve proprioception.

Plyometric Workouts

Incorporate jumping exercises such as box jumps or jump squats, emphasizing the need for soft landings. Start with lower heights and progress gradually. During plyometric workouts, be mindful of maintaining an engaged arch to foster strength development and mitigate the risk of injury.

Incorporating Tools and Equipment

A foot arch is being strengthened using resistance bands and a therapy ball on a flat surface

When it comes to strengthening the arches of your feet, incorporating specific tools and equipment can enhance the effectiveness of your exercises. These aids help apply the right amount of resistance and support to progressively improve foot strength.

Resistance Bands

Resistance bands are an excellent tool for adding progressive tension to arch strengthening exercises. By looping a band around your foot, you can perform exercises such as:

  • Band Pulls: Attach the band to a stationary object and pull your toes towards you.
  • Point and Flex: Point your toes against the band’s resistance, then flex them back.

This direct resistance helps target the muscles in your arch more precisely.

Foot Domes

Foot domes or balance pods provide a curved surface that challenges your foot muscles. You can perform exercises like:

  • Dome Presses: Stand on the dome and press your arches up and down.
  • Heel Raises: While standing on the dome, lift your heels to strengthen the calf muscles and the arch.

Using foot domes during these exercises helps to improve your proprioception and balance, key components of foot health.

Exercise Routine Structure

When structuring your exercise routine for strengthening the arch of your foot, consistency and progression are vital. You’ll want to begin with a warm-up to prepare your feet for the exercises. This can involve simply walking on your toes and heels for a few minutes or rolling a ball under your feet to stimulate the muscles and tendons.

Your main routine should include a variety of exercises targeting different aspects of your foot strength.

  • Short Foot Exercise: Aim to do 3 sets of 10 repetitions on each foot. Gradually increase the hold time as you progress.
  • Toe Curls: Start with 3 sets of 5 repetitions and increase as your strength improves.

Between exercises, take a 30-second rest to prevent overworking the muscles.

Week Short Foot Exercise Toe Curls Rest Time
1 3×10 Reps 3×5 Reps 30s
2 3×12 Reps 3×7 Reps 30s
3 3×15 Reps 3×10 Reps 30s

Ensure to incorporate exercises that are geared towards strengthening the intrinsic (deep) muscles in your feet, such as using your toes to pick up objects or marbles.

At the end of your workout, a cooldown is essential to help your muscles recover and prevent injury. Stretching the plantar fascia and calf muscles gently should suffice.

Remember, it’s important to pay attention to your body’s signals. If you experience any pain, stop the exercises, and consult a healthcare professional. With time and dedication, you can progressively increase the intensity and complexity of the exercises to further enhance your arch strength.

Common Mistakes to Avoid

When aiming to strengthen the arches of your feet, being aware of common errors can help you maximize the benefits of your exercises and avoid injury.

  • Not Keeping Proper Alignment: Your feet should be parallel to each other during exercises. Allowing your foot to rotate in or out can lead to improper muscle engagement.

  • Rushing Through the Movements: Slow, controlled movements ensure that the correct muscles are being activated. Rushing can cause you to rely on momentum rather than muscle strength.

  • Ignoring Pain: If you experience pain, stop the exercise. Pushing through foot pain can lead to further injury.

  • Forgetting to Stretch: Always stretch your feet before and after exercises to avoid muscle strains.

  • Overworking Your Feet: Starting with too many repetitions can lead to overuse injuries. Begin with a few reps and increase as you get stronger.

  • Neglecting Other Foot Areas: The arch is connected to other parts of the foot. Include exercises that work the toes, heel, and ankle.

  • Wearing Inappropriate Shoes: Wear supportive shoes that do not constrict your feet. Barefoot training can also be beneficial.

Remember to maintain good form and listen to your body throughout your foot strengthening routine. Improper technique can lead to ineffective training or injury. For detailed guidance, consider expertise on arch lifts in Pilates which can aid in strengthening your foot’s arch effectively and safely.

Safeguarding Against Injury

A foot is shown doing exercises with resistance bands to strengthen the arch. The foot is positioned on a flat surface, with the bands looped around the toes and anchored on the floor

When embarking on exercises to strengthen the arch of your foot, it’s crucial to protect yourself from injury. Your arch is fundamental to your foot’s structural integrity and plays a key role in movement. Here are steps to ensure you stay safe:

Start Slowly:

  • Begin with basic exercises and gradually increase intensity.
  • Recognize your limits and avoid overexertion.

Proper Footwear:

  • Wear supportive shoes that are appropriate for your foot type and the exercise you’re doing.

Warm-Up:

  • Always warm up before starting your routine.
  • Simple toe curls and foot doming can prepare your muscles for more demanding workouts.

Technique Matters:

  • Focus on correct form to avoid strain.
  • Take time to learn the exercises, it’s better to perform fewer repetitions correctly than more with poor form.

Listen to Your Body:

  • Pain is a warning sign; stop if you feel discomfort beyond normal muscle fatigue.
  • Give yourself regular rest days to allow for recovery.

Including exercises like marble pickups and arch lifts could aid in strengthening the intrinsic foot muscles and potentially prevent common overuse injuries such as plantar fasciitis. Remember, these exercises must be done with precision to build strength effectively and prevent injury.

Monitoring Progress and Adaptations

When embarking on a routine to strengthen the arch of your foot, tracking your progress is key. You’ll want to ensure that you’re making strides in your strength and stability, and adapting your exercises appropriately.

  • Initial Assessment:
    Start with an evaluation of your current arch strength. Can you hold an arch lift for several seconds? Can you pick up marbles with your toes?

  • Recording Baseline:
    Document how long you can perform activities like the arch lift or marble pickup. Write down the number of repetitions you can comfortably achieve.

Weekly Check-ins:
Set a weekly schedule to reassess your capabilities. Are you able to perform more repetitions? Can you hold the exercises for a longer duration?

Adapt Exercises As Needed:
If something feels too easy or too challenging, modify it. Gradually increase the difficulty by:

  • Changing the number of repetitions
  • Adjusting the duration of each exercise
  • Incorporating new exercises, such as those involving a strength ball for your feet

Notice Changes:
Pay attention to how your feet feel during everyday activities. Improvement in arch strength can lead to less discomfort when walking or standing.

Exercise Week 1 Week 2 Week 4 Changes Made
Arch Lifts 8 reps 10 reps 12 reps +2 reps each week
Marble Pickup 15 marbles 18 marbles 20 marbles +3 marbles each week

Remember to update your plan every few weeks to ensure continuous progress. Always listen to your body and consult a professional if you’re unsure about any adaptations.

Frequently Asked Questions

In this section, we address common inquiries about enhancing the strength of the arches in your feet, from exercises that target flat feet to the benefits of ballet and the underlying causes of weak arches.

What are the best exercises to improve strength in flat feet?

Incorporating exercises like toe curls and marble pickups can be very effective in strengthening the intrinsic muscles of your flat feet.

Are there specific foot exercises recommended by the NHS for fallen arches?

While the NHS offers general advice on foot care, specific exercises such as short foot exercises and arch lifts are widely recommended by podiatrists for fallen arches.

How can runners strengthen the arches of their feet?

Runners may benefit from exercises that emphasize endurance and flexibility of the arch, including heel raises and toe stretches.

Which exercises can help to rebuild the arch in flat feet?

Exercises such as calf stretches and foot doming are effective in working toward rebuilding the arch in flat feet.

Can practicing ballet improve the arch of the foot?

Yes, the footwork in ballet requires and thus helps to build greater foot strength and arch flexibility, which can lead to an improved arch.

What are the causes of weak arches in the feet?

Weak arches can arise from a variety of causes, including genetics, injury, or conditions such as obesity and diabetes that place significant strain on the feet.

Stretching Exercises for Plantar Fasciitis: A Guide to Alleviate Heel Pain

Stretching Exercises for Plantar Fasciitis: A Guide to Alleviate Heel Pain

Stretching exercises for plantar fasciitis can be a game-changer when it comes to managing that dreaded heel pain. This guide dives deeper, offering a comprehensive approach to not only stretching but also incorporating warm-ups, cool-downs, and strengthening exercises. By the end, you’ll be equipped with a personalized toolkit to target plantar fasciitis and get you back to moving comfortably.

Stretching Exercises for Plantar Fasciitis: Relief and Prevention

Plantar fasciitis is a common cause of heel pain that affects millions of people every year. This condition occurs when the plantar fascia, a thick band of tissue that runs across the bottom of your foot and connects your heel bone to your toes, becomes inflamed. Symptoms typically include a stabbing pain that usually occurs with your first steps in the morning. As you get up and move more, the pain normally decreases, but it might return after long periods of standing or when you stand up after sitting.

Stretching exercises are widely recognized as an effective method for relieving the pain associated with plantar fasciitis and improving foot health. Regularly performing these exercises can help stretch and strengthen the plantar fascia, Achilles tendon, and lower leg muscles, which can alleviate current pain and reduce the risk of future discomfort. Additionally, a well-structured routine that includes warm-ups, key stretching exercises, and cool-downs is essential for not only managing symptoms but also preventing plantar fasciitis from worsening or reoccurring.

Key Takeaways

  • Stretching exercises can significantly reduce pain from plantar fasciitis and aid in recovery.
  • A consistent exercise routine can prevent future episodes of plantar fasciitis.
  • Incorporating warm-up and cool-down techniques is crucial for the effectiveness of the stretching routine.

Understanding Plantar Fasciitis

Plantar Fasciitis is a common foot condition that causes pain in the heel and the bottom of the foot. It occurs when the plantar fascia, the thick band of tissue that runs across the bottom of your foot and connects your heel bone to your toes, becomes inflamed.


  • Symptoms: The main symptom is a sharp, stabbing pain in the heel, particularly after taking your first steps in the morning or after long periods of sitting.
  • Causes: Plantar Fasciitis is often the result of repetitive strain injury to the ligament of the sole of the foot. Possible causes include excessive running or walking, inadequate footwear, and abnormal foot mechanics.

Here are key points about the condition:

  • It’s more common in runners.
  • People who are overweight and those who wear shoes with inadequate support are at a higher risk.
  • Tight Achilles tendons, which are the tendons attaching your calf muscles to your heels, may also contribute to plantar fascia pain.

Treatment usually focuses on relieving inflammation and stretching the plantar fascia and Achilles tendon, and strengthening lower leg muscles, which helps to stabilize your ankle and heel. A combination of physical therapy, night splints, and heel inserts might also be recommended to help lessen pain and cure the inflammation in the plantar fascia.

Essential Equipment for Stretching

When managing plantar fasciitis, using the right stretching equipment can enhance your stretching routine and potentially ease foot pain. Here’s a concise list of effective tools that you might find beneficial:

  • Stretching Straps: Aids in deepening stretches by allowing you to pull your foot closer and hold stretches longer without strain.
  • Foam Rollers: Provides a deep massage for the calf muscles and plantar fascia, increasing blood flow and flexibility.
  • Cold Therapy: Using a frozen water bottle to roll under your foot can help decrease inflammation and provide relief.
  • Orthotic Inserts: Inserts in your shoes can provide the necessary arch support and help distribute pressure evenly during daily activities.

Recommended Stretching Aids:

Equipment Purpose Example
Stretching straps Improve stretch reach and control Temu Stretching Gear
Foam rollers Deep muscle and fascia massage  
Frozen water bottle Inflammation reduction and massage  
Orthotic inserts Arch support and pressure distribution  

Remember to use these tools as part of a comprehensive stretching regimen. Consistency and proper technique are key in managing plantar fasciitis symptoms. Always consult with a healthcare professional before starting any new treatment or exercise program to ensure it is appropriate for your specific condition.

Warm-Up Techniques Before Stretching

Before engaging in stretching exercises for plantar fasciitis, initiating a proper warm-up routine is crucial. Warming up gradually increases blood flow to the muscles and tendons, which can help prevent injury and make your stretches more effective.

Step 1: Begin with a Short Walk

  • Duration: 5-10 minutes
  • Pace: Start slow and gradually increase to a brisk walk
  • Objective: Increase heart rate and circulation gently

Step 2: Toe Tapping

  • Duration: 2 minutes
  • Activity: Lightly tap your toes on the ground, keeping your heel planted
  • Aim: Activate the muscles in your feet and lower legs

Step 3: Ankle Rolls

  • Duration: 1 minute per ankle
  • Direction: Rotate each ankle slowly in a circular motion
  • Benefit: Loosen the ankle joint and improve mobility

After these initial warm-up activities, your feet should feel more pliable and ready for stretching. Remember, you’re preparing your body to alleviate discomfort from plantar fasciitis; listen to your body and avoid any movements that cause pain beyond a mild warm stretch.

Key Stretching Exercises

Incorporating specific stretches into your routine can help alleviate pain from plantar fasciitis. Focusing on your calves, plantar fascia, and toes will aid in improving flexibility and reducing tension in your feet.

Calf Stretches

Standing Wall Stretch: Face a wall, extend one leg straight behind you, keeping the heel flat and your foot pointed straight ahead. Lean forward towards the wall keeping your back leg straight, and hold for 15 to 30 seconds. Switch legs. Perform this stretch 2-3 times per leg.

Plantar Fascia Stretches

Seated Foot Roll: With a seated position on a chair, take a cold water bottle or a round object and roll it under your foot from the heel to the toes. Spend at least one minute on this activity per foot. For comprehensive steps on exercises for plantar fasciitis, consider visiting 10 Easy Plantar Fasciitis Stretches & PT Exercises.

Toe Stretches

Towel Toe Curls: Place a towel flat on the ground and use only your toes to scrunch the towel towards you. Keep your heel planted on the ground. Repeat this motion for about 15 to 30 seconds and perform three sets for each foot.

Strengthening Exercises

Incorporating strengthening exercises for plantar fasciitis is critical in building foot muscles to better support your arch and minimize stress on the plantar fascia.

Towel Curls

Place a towel flat on the ground and sit in a chair facing it. Using only the toes of one foot, grab the towel and scrunch it towards you, then release. Perform this exercise for 2-3 sets of 10 curls for each foot to help strengthen the muscles under your feet.

Toe Walks

Stand upright and then raise up onto the tips of your toes. Walk around the room for 60 seconds, staying elevated on your toes. This exercise not only strengthens the muscles in your toes but also in your calves and the arch of your foot.

Achilles Tendon Strengthening

Stand facing a wall at arm’s length, place your palms flat against the wall at shoulder height. Step one foot back, heel flat on the ground, and gently lean toward the wall until you feel a stretch in your Achilles tendon and calf. Hold for 15-30 seconds, repeat 2-3 times, then switch to the other leg. This not only helps in stretching but also strengthens the muscles around the Achilles tendon, providing better support for your plantar fascia.

Cool-Down Techniques After Stretching


After completing stretching exercises for plantar fasciitis, cool-down techniques can help ease your muscles back to rest and aid recovery. Here are some effective methods:


  • Gentle Walking: Spend a few minutes walking at a slow pace. This can help to decrease heart rate and prevent blood from pooling in the stretched muscles.
  • Breathing Exercises: Deep, controlled breathing helps to oxygenate your body and can promote relaxation of the muscles.
  • Light Massage: Gently massage the plantar fascia, the arch, and calf muscles. Use smooth, light strokes to help reduce any tension.

Hydration is crucial. Drink water to help your body recover and to ensure proper muscle function.

Cool-Down Stretches:

  • Seated Towel Stretch: Sitting down, place a towel around the ball of your foot and gently pull towards you, keeping the knee straight.
  • Foot Circles: Lift your foot off the ground and slowly rotate it at the ankle, first clockwise then counter-clockwise.

Here’s a table of activities and the time you should spend on each during your cool-down:

Activity Duration
Gentle Walking 3-5 minutes
Breathing Exercises 2-3 minutes
Light Massage 5 minutes
Seated Towel Stretch 30 secs each foot
Foot Circles 10 reps per direction

By following these cool-down techniques, you’ll help your body wind down after stretching and support your plantar fasciitis recovery process. Remember to listen to your body and cease any activity if you feel pain.

Daily Stretching Routine

A daily stretching routine can significantly alleviate the discomfort caused by plantar fasciitis. Incorporating specific exercises in the morning and evening can help maintain flexibility and reduce tension in the plantar fascia.

Morning Stretches

  • Seated Towel Stretch: Sit on your bed with your legs stretched out in front of you. Loop a towel around the ball of your foot and gently pull towards you, keeping your knee straight. Hold this stretch for 15-30 seconds and repeat three times for each foot. This is an effective way to lessen morning heel pain.
  • Frozen Water Bottle Rolls: Place a frozen water bottle on the floor. Roll your foot over the bottle for 5 minutes to ease out the plantar fascia and provide an anti-inflammatory effect.

Evening Stretches

  • Wall Calf Stretch: Stand arm’s length from a wall with your palms flat against it. Step one foot back and press its heel to the floor. Bend your front knee and lean forward, keeping your back heel on the ground. Hold for 30 seconds, then switch sides.
  • Ballet Raises: Stand with your back straight and rise onto the balls of your feet, lifting your heels. Hold the position for a count of three, then lower your heels back down. Perform three sets of ten raises to strengthen your calf muscles and Achilles tendon.

Injury Prevention and Maintenance

When managing plantar fasciitis, prevention, and ongoing care are vital to ensure you don’t experience a recurrence of symptoms. By incorporating some key practices into your routine, you can support the wellness of your feet and reduce the risk of future injury.


  • Footwear: Always choose shoes with adequate support, especially in the arch area, to lessen the strain on your plantar fascia. Appropriate cushioning can also absorb the impact while walking or running.
  • Weight Management: Maintaining a healthy weight minimizes the stress on your feet. Extra weight can contribute to plantar fasciitis, so a balanced diet and exercise are beneficial for prevention.

  • Stretching: Regularly perform stretches targeted at your plantar fascia, Achilles tendon, and calf muscles to maintain flexibility and prevent tightness. Examples such as the frozen water bottle roll and toe-to-heel stretches are particularly helpful.
Stretch Name Description Frequency
Calf Stretch Lean into a wall with one foot behind you to stretch the calf of the rear leg. 2-3 times daily
Towel Stretch Pull on a towel looped around the foot while keeping your knee straight to stretch the bottom of the foot. Morning and night
  • Exercise Wisely: Engage in low-impact sports like swimming or cycling, which don’t overstrain your feet.

Incorporate these strategies into your daily routine to help prevent plantar fasciitis from becoming a chronic issue. Remember that consistency is key for injury prevention and maintenance.

Stretching Exercises for Plantar Fasciitis: Your Path to Freedom from Heel Pain

Remember that first painful step out of bed we mentioned? Stretching exercises for plantar fasciitis can become your secret weapon against that unwelcome visitor. This guide has equipped you with a personalized arsenal of stretches, warm-ups, cool-downs, and strengthening exercises – all designed to tackle plantar fasciitis and get you moving pain-free.

Think about it – wouldn’t it be amazing to ditch the ice packs and morning wince? Imagine starting your day without that dull ache in your heel, ready to conquer whatever adventures await. With consistent effort and the tools you’ve gained here, that pain-free reality can be yours.

So, lace up your sneakers, grab your water bottle, and put this knowledge into action! Remember, consistency is key. Start incorporating these stretches into your routine, and feel free to reach out if you have any questions. Happy stretching, and happy healing!

Frequently Asked Questions

Effective management of plantar fasciitis includes targeted stretches that can relieve pain and improve foot function. These FAQs provide insights into the best practices for stretches and exercises specifically for those suffering from plantar fasciitis.

What are some effective stretches to alleviate plantar fasciitis symptoms?

To mitigate the symptoms of plantar fasciitis, consider incorporating calf stretches, toe stretches, and rolling your foot over a frozen water bottle. These stretches work to loosen the plantar fascia and calf muscles, which are often tight in those with plantar fasciitis.

Is it beneficial to perform plantar fasciitis exercises before getting out of bed?

Yes, performing gentle stretches before stepping out of bed can substantially reduce morning heel pain caused by plantar fasciitis. A simple routine may include toe pulling or towel stretches to warm up the plantar fascia.

How often should stretching exercises be done to help with plantar fasciitis?

It’s recommended that you engage in plantar fasciitis stretching exercises two to three times a day. Consistency is key to garnering the best results, especially after long periods of rest or sitting.

Are there specific foot strengthening exercises that can support plantar fasciitis recovery?

Indeed, strengthening exercises such as towel grabs and arch lifts can fortify the muscles around your plantar fascia, providing better support and reducing stress on the ligament.

Can stretching exercises completely resolve plantar fasciitis issues?

While stretching exercises are critical in managing and alleviating plantar fasciitis pain, they may not completely resolve it for everyone. Consultation with a healthcare professional is essential for a comprehensive treatment plan.

What exercises should be avoided to prevent worsening plantar fasciitis discomfort?

To prevent exacerbating plantar fasciitis pain, avoid high-impact activities such as running on hard surfaces or exercises that put excessive strain on your heel and surrounding tissue. Stick to low-impact forms of exercise, such as swimming or cycling, while you’re in recovery.

Foot Pain No More!

Join our community of foot enthusiasts at feet-relief.com and Facebook! We offer engaging content, insightful product reviews, and a passionate community dedicated to all things feet. Let’s keep those steps light and pain-free together!

Exercises to Prevent and Manage Shin Splints: A Guide to Reducing Pain and Enhancing Recovery

Exercises to Prevent and Manage Shin Splints: A Guide to Reducing Pain and Enhancing Recovery

Exercises to prevent and manage shin splints are a crucial weapon in any athlete’s arsenal. These frustrating aches along the shinbone can sideline you from your favorite activities, but with the right approach, you can keep them at bay.


This guide takes a comprehensive look at shin splints, delving into their causes and risk factors. We’ll provide you with effective prevention strategies, treatment options, and a plan for safely resuming your activities. Our goal is to help you get back to enjoying your workouts without pain. Let’s begin!

Exercises to Prevent and Manage Shin Splints: Keeping You Active and Pain-Free

Shin splints, a common issue among athletes and fitness enthusiasts, refer to the painful sensation along the shinbone that can arise from a variety of activities, particularly those involving running or jumping. To prevent and manage this frustrating condition, incorporating specific exercises into one’s routine is important. These exercises are designed not only to prevent the onset of shin splints by strengthening and stretching the leg muscles but also to provide relief and expedite recovery if they do occur.

Understanding the mechanics behind shin splints is crucial in selecting the right exercises and implementing effective strategies. Preventing shin splints involves a combination of strengthening the muscles around the shinbone and the lower leg, as well as employing appropriate stretching routines to maintain flexibility. Meanwhile, if you’re already experiencing shin splint discomfort, certain treatment approaches can be utilized to manage pain and facilitate a safe return to activity. Ensuring proper technique and progressively increasing the intensity of your activities can significantly contribute to preventing the recurrence of shin splints.

Key Takeaways

  • Strengthening and stretching exercises help prevent and manage shin splints.
  • A gradual approach to activity increases safety and efficiency.
  • Correct form and technique are critical in reducing shin splint risk.
 

Understanding Shin Splints

Shin splints, or medial tibial stress syndrome, refer to pain along or just behind the tibia, the large bone in the front of your lower leg. This condition is common among runners, dancers, and military recruits.

Anatomy of the Lower Leg

Your lower leg is comprised of several key structures: bones, muscles, tendons, and connective tissues. The tibia and fibula are the two main bones that support your body weight. The muscles surrounding these bones, such as the gastrocnemius and soleus muscles, contribute to the movement and stability of your ankle and foot.

Causes of Shin Splints

Shin splints often occur due to repetitive stress on the shinbone and the tissues attaching the shinbone to the muscles surrounding it. This stress leads to inflammation and pain. Overworking the lower leg by engaging in intense activities without proper conditioning can lead to this overuse injury.

Risk Factors

  • Intense Physical Activity: Sudden increases in physical activity or changes in workout intensity.
  • Improper Footwear: Wearing shoes that do not offer adequate support can lead to abnormal stress on the lower leg.
  • Arch Type: People with flat feet or rigid arches are more prone to developing shin splints.
  • Surface: Running or training on hard or uneven surfaces can increase the risk.

By understanding the anatomy, causes, and risk factors, you can take targeted steps to prevent shin splints or manage the condition effectively should it occur.


Preventative Strategies

Implementing preventative strategies is essential in avoiding shin splints. Focus on footwear selection, optimizing your running form, and incorporating cross-training to mitigate injury risk.

Proper Footwear Selection

Selecting the right footwear is crucial for shin splint prevention. Your shoes should provide adequate support and match your foot type. Overpronators may need motion-control shoes, while neutral runners might opt for cushioned footwear. Replace your running shoes every 300-500 miles to ensure proper cushioning and support.

Running Technique and Form

Your running mechanics directly affect shin splints risk. Aim for a midfoot strike rather than landing on your heel, as this can decrease stress on your shins. Keep your strides short and quick to minimize the impact on each step. Utilize technique drills and form checks to maintain a correct running posture and stride mechanics.

Cross-Training Considerations

Incorporate cross-training to reduce repetitive strain on your shins. Engage in low-impact activities like swimming or cycling to allow your shins to recover while maintaining fitness. Include strength training in your routine, focusing on calf, ankle, and foot muscles to improve stability and decrease the likelihood of overuse injuries.


Strengthening Exercises

In managing and preventing shin splints, focusing on exercises that build strength in the lower legs is essential. These specific exercises aim to enhance calf muscle power, provide arch support, and improve ankle mobility — key areas that contribute to shin stability.

Calf and Toe Strength

Your calves play a crucial role in absorbing the shock that travels up your leg when your feet hit the ground. Strengthening your calf muscles helps alleviate the strain on your shins.

  • Calf Raises: Perform this exercise by standing with your feet hip-width apart. Push up onto your tiptoes and hold momentarily before lowering back down. Aim for 2-3 sets of 15-20 repetitions. For detailed guidance, consider the steps outlined in this shin splint prevention guide.
  • Toe Walks: This low-impact exercise targets the muscles along your shin. Walk on your tiptoes for 30 seconds. Aim for multiple sets to effectively engage the shin muscles as per this list of best exercises for shin splints.

Arch Support Strengthening

Building the strength of your foot arch can be vital in stabilizing your ankle and reducing stress on your shin.

  • Towel Scrunches: Place a towel on the floor and use your toes to scrunch it toward you. Do this for 1 minute per foot.
  • Heel Walks: Lift the front of your feet and walk on your heels for 30-60 seconds. It will help to fortify the muscles that support your arch.

Ankle Mobility

Ankle flexibility and strength are important for preventing excessive pronation and improving overall leg alignment.

  • Ankle Circles: Sit down with your feet off the ground and move your ankles in circular motions. Do 20 circles in each direction, for each ankle.
  • Alphabet Writing: Use the tip of your foot to ‘write’ the alphabet in the air, which encourages a full range of motion.

Stretching Routines

Regular stretching can greatly reduce the risk of shin splints by improving flexibility and balance in your lower legs. Incorporate these specific stretches into your routine to target areas commonly affected by shin splints.

Calf and Achilles Stretches

To maintain flexibility in the calf muscles and relieve tension in your Achilles tendon, start with a Wall Calf Stretch. Face a wall, extend your arms forward, and place your hands flat against the wall. Step one foot back, keeping it flat on the ground, and push your heel down until you feel a stretch in the calf muscle. Hold for 15 to 30 seconds and switch legs.

Tibialis Anterior Stretch

Stretching the tibialis anterior muscle is crucial because it can tighten when you have shin splints. To perform this stretch, use a Kneeling Shin Stretch. Kneel on the ground and sit back on your heels with the tops of your feet flat on the floor. Gently press down to increase the stretch and hold for 15 to 30 seconds.

Hamstring and Quadriceps Stretches

Keeping your quadriceps and hamstrings flexible can affect the balance of your leg muscles. For the hamstrings, you can try a Hamstring Wall Stretch, where you lie on your back, place your foot against a wall, and straighten your knee to stretch the hamstring. Finally, standing quad stretches will aid in stretching the front thigh muscle. Stand up straight, pull your foot towards your glutes, and hold for 15 to 30 seconds, ensuring your knee points down to maximize the stretch.

Treatment Approaches

To effectively manage shin splints, your approach should include immediate care post-injury, targeted rehabilitation exercises, and potentially the use of orthotics to aid recovery.

Immediate Actions Post-Injury

After experiencing shin pain, immediately rest your legs to avoid further injury. Apply ice packs to the affected area for 15-20 minutes at a time several times a day to reduce swelling. Elevate your legs when possible, and consider using compression to alleviate swelling and provide support.

Rehabilitation Exercises

Once acute pain decreases, gradually introduce rehabilitation exercises. Exercises like toe curls and heel drops can strengthen and stretch the muscles around the shin. Perform exercises in sets and repetitions that do not worsen pain.

  • Toe curls: Place a towel flat on the floor and use your toes to scrunch it towards you.
  • Heel drops: Stand with your heels hanging off a step and slowly lower them below the level of the step.

For specific exercises intended to reduce shin splint pain, you can practice hip raises or engage in calf stretches. These exercises help promote muscle balance and injury prevention.

Use of Orthotics

If your shin splints are related to foot mechanics, orthotics may be beneficial. They can provide support and correct structural abnormalities. Custom orthotics should be considered, but over-the-counter insoles that offer arch support can also be effective. Always have your gait and foot type assessed to ensure you’re using the right orthotic solution.

  • Orthotics for flat feet: Look for insoles with arch support.
  • Orthotics for high arches: Choose insoles with cushioning to absorb impact.

Remember to integrate these treatment approaches with advice from healthcare professionals to optimize your recovery.

Recovery And Return To Activity

After sustaining shin splints, it’s crucial to follow a structured approach to recovery and a careful return to physical activity. These methods help ensure your return to running or sports is safe and sustainable, reducing the risk of re-injury.

Assessing Recovery Progress

Before resuming strenuous activities, confirm that you’ve properly healed. Signs of recovery include absence of pain when pressing on the tibia and during regular walking. Your ability to perform gentle stretches and strengthening exercises without discomfort also suggests that the shin splints are resolving. For instance, if you can complete 15-20 calf raises without pain, you may be ready to move forward.

Gradual Return to Running

When returning to running, start at a lower intensity and volume. You might begin with a walk-run protocol:

  • Start with 1-minute jogging intervals, interspersed with 5 minutes of walking.
  • Gradually increase jog time and decrease walk time over several weeks.

Monitor for any signs of pain, and if they reappear, dial back the intensity. For more structured guidance, refer to coaching-provided running regimes.

Long-Term Management Strategies

To prevent shin splints from recurring, integrate preventative exercises into your regular workout routine, like toe curls and resistance band work to target the shin muscles. Incorporate proper warm-up and cool-down routines, paying attention to the calf and shin areas. Adjust running form and footwear if necessary, since improper gear or technique can contribute to shin splints. Maintain a balanced exercise plan with adequate rest to allow for muscle recovery.

Exercises to Prevent and Manage Shin Splints: Your Path to Pain-Free Movement

By incorporating the strategies outlined in this guide, you’ve equipped yourself with a powerful toolkit to combat shin splints. From understanding the causes and risk factors to implementing preventative exercises, treatment approaches, and a safe return-to-activity plan, you now have the knowledge to keep yourself moving and pain-free.

Have you ever battled shin splints? Share your experiences and any questions you may have in the comments below. Remember, consistency is key! By integrating these exercises and maintaining proper form in your activities, you can significantly decrease your risk of shin splints and keep yourself on the road to achieving your fitness goals. Thanks for reading!

Frequently Asked Questions

Understanding proper techniques and exercises is crucial when dealing with shin splints. This section provides information to help you manage and prevent this common condition.

What are the best stretching routines to manage shin splints?

Stretching routines that target the muscles surrounding your shins are beneficial. For example, doing toe curls and wall stretches can help alleviate the symptoms of shin splints.

How do calf strengthening exercises aid in the prevention of shin splints?

Calf strengthening exercises provide stability to your lower legs and can reduce the strain on your shins. Performing exercises like calf raises aids in developing the muscles to better support your shin bones.

What are the recommended exercises by the NHS for shin splints recovery?

The NHS recommends gentle stretching of the calf muscles, along with specific exercises like heel drops and toe raises, to aid in recovery from shin splints.

Can specific exercise modifications help in avoiding shin splints?

Yes, modifying how you exercise can help prevent shin splints. Activities such as running on softer surfaces and choosing footwear with proper support can significantly impact shin health.

What types of foot and ankle exercises can improve shin splint conditions?

Exercises such as ankle dorsiflexion, ankle inversion, and eversions strengthen the lower leg muscles, which can improve shin splint conditions and enhance overall foot health.

Are there techniques to strengthen the shin area and prevent the occurrence of shin splints?

Techniques to strengthen the shin area include shin muscle exercises like toe taps and resistance band exercises. Building the anterior tibialis muscle helps prevent shin splints by supporting the tibia during high-impact activities.

Conquer Foot Pain and Join the Community!


Ready to ditch the discomfort and embrace pain-free movement? Visit our website, feet-relief.com, for engaging content, expert product reviews, and everything you need to keep your feet happy. Join our passionate community on Facebook (https://www.facebook.com/4feet.relief) and connect with fellow foot health enthusiasts!

Optimized by Optimole